
Importing counterparties from Excel
You can load counterparties from an Excel template in one file. Fill in the template without changing column names or order, open "Directories → Counterparties and individuals", click "Import", select the file and confirm.
When to use import
Excel import saves time when your table already has dozens or hundreds of counterparties, for example when you move from another system. After the import, you can immediately create orders by selecting the loaded counterparties.
How to import counterparties
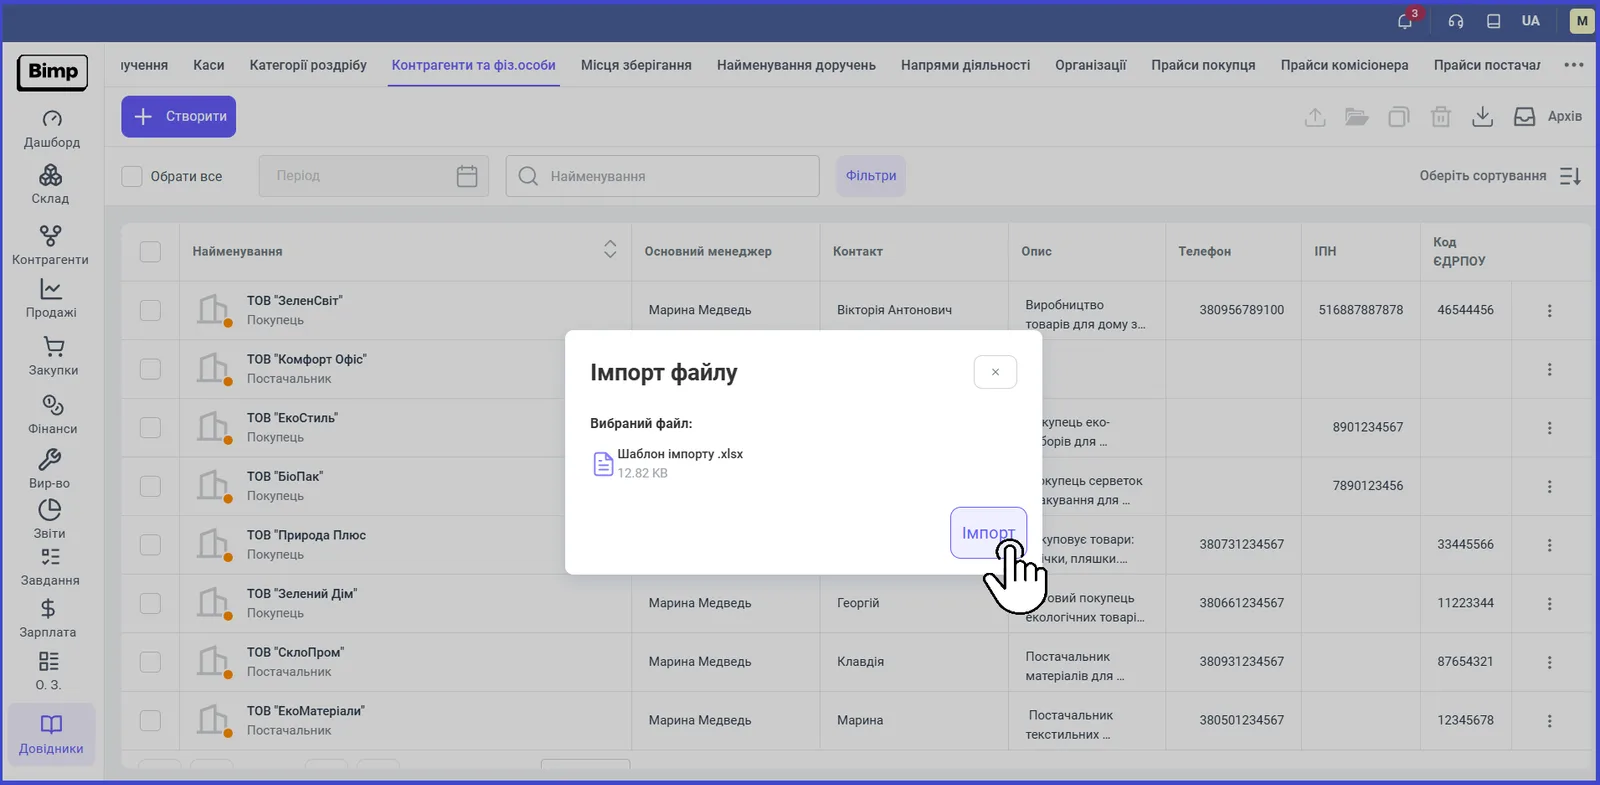
Run the import from the “Counterparties and individuals” directory using the ready-made template.
- Download the counterparty import template (Bimp templates are on the import templates page) and fill in the columns: name, Tax ID, EDRPOU, contacts and addresses.
- Open Directories and go to the “Counterparties and individuals” tab.
- Click Import at the top of the screen.
- In the “File import” window, select the filled-in file.
- Click Import in this window. Bimp creates the counterparty cards.
What to check after the import
Open the directory and make sure the cards were created with legal and actual addresses, phone numbers and other data. Then add contracts, see Customer contract. For the card form, see Counterparty card. Importing products is described in Importing products and stock balances from Excel.
FAQ
Can I change the columns in the counterparty import template?
No. Changing column names and their order is not allowed: otherwise Bimp will not recognize the data.
What data can I import?
Name, Tax ID, company registry code (EDRPOU), contacts and addresses of customers and suppliers.