
Counterparty card: how to add a customer or supplier
On this page
The counterparty card in Bimp stores the details of a customer, supplier or individual, together with their accounts, contacts, addresses, contracts and reconciliation statements. To create a card, open "Counterparties", click "Create", enter the name and type, fill in the details and save.
Where to create a counterparty card
You can create a counterparty card in three ways:
- in the Counterparties menu, click Create;
- in the Directories menu, open the “Counterparties and individuals” tab and click Create;
- in the Sales menu on the “Dashboard” tab, click Counterparty.

How to fill in the counterparty card
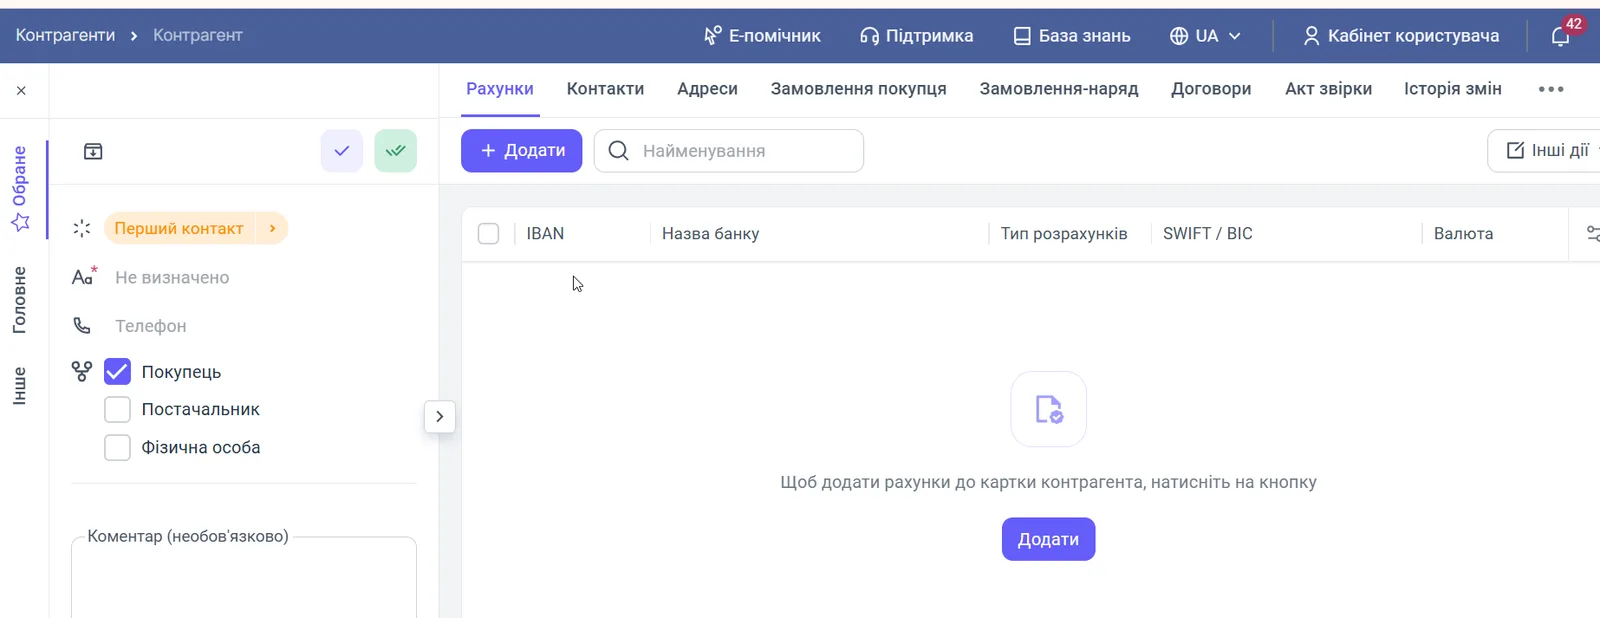
Only the name and type are needed to create a counterparty; you can add the rest later. The left panel of the card is divided into the sections “Favorites”, “Main” and “Other”. All articles in this section are listed on the “Counterparties and contracts” page.
- Select the “Status”, the stage of work with the counterparty (for example, “First contact”).
- In the “Name” field, enter the counterparty name and, if needed, the “Phone”.
- In the “Counterparty type” field, tick “Customer”, “Supplier” or “Individual”. You can choose several types. The “Individual” type is convenient for employees.
- If needed, add a comment (up to 1000 characters).
- In the “Main” section, fill in:
- “Print name”, the full legal name for printed forms, invoices and reconciliation statements;
- “Director / Owner”;
- “Country” and “Region”;
- “Tax ID” and “Company registry code (EDRPOU)”;
- “Parent counterparty”, if this is a branch or a sole proprietor (FOP) of a group, see Counterparties with subsidiaries;
- “Lead source”, see Customer lead sources.
- In the “Other” section, if needed, specify the “Counterparty ID” (a unique number in Bimp, if the counterparty also uses Bimp), an “Additional identifier”, characteristics with Add characteristic and links with Add link.
- Click Save (the button with a check mark at the top of the left panel).
What tabs the counterparty card has
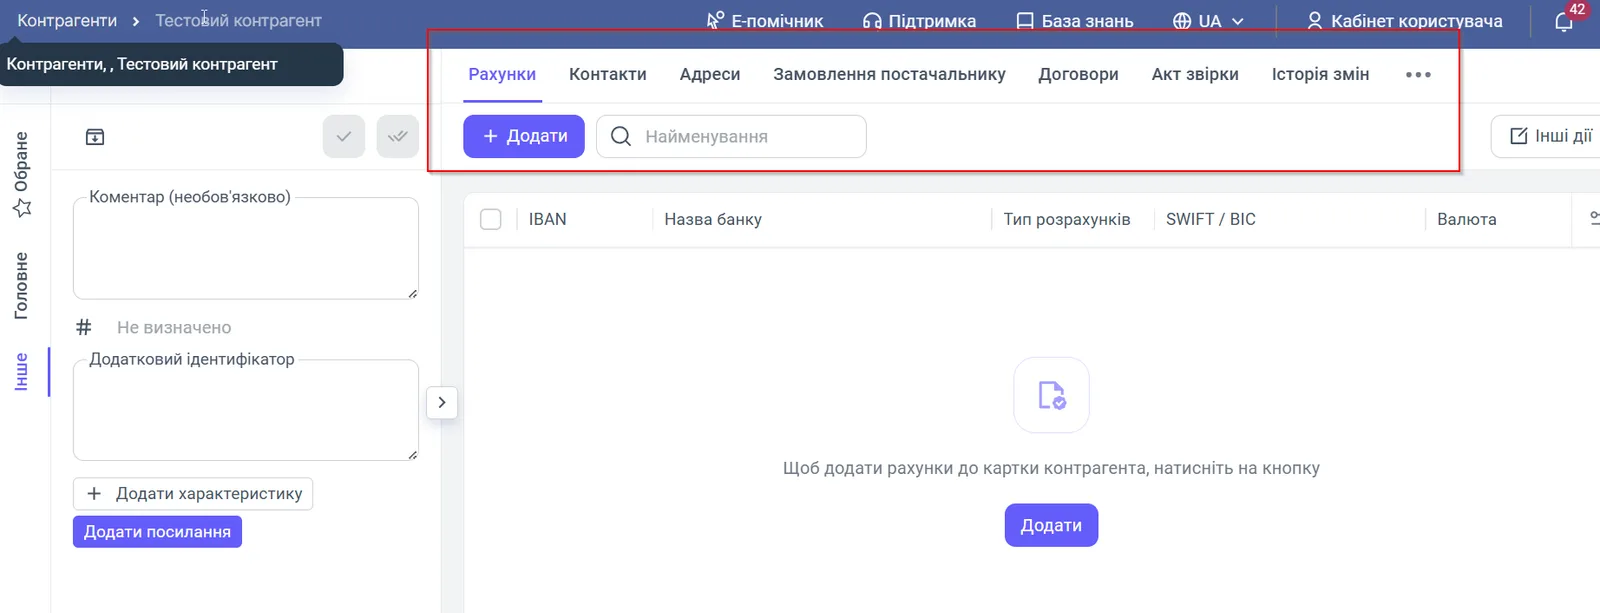
On the right side of the card there are tabs with additional counterparty data.
| Tab | What it contains |
|---|---|
| “Accounts” | The counterparty’s bank accounts (IBAN, bank name, settlement type, SWIFT / BIC, currency); they simplify creating documents and payments |
| “Contacts” | Name, position, phone and e-mail of responsible persons |
| “Addresses” | Legal, actual and mailing addresses and delivery addresses |
| “Customer orders”, “Supplier orders”, “Work orders” | All orders of the counterparty; the set of tabs depends on the counterparty type |
| “Contracts” | The counterparty’s contracts, see Customer contract |
| “Reconciliation statement” | Reconciliation statements and the history of settlements, see Reconciliation statement |
| “Change history” | All changes to the card |
How to add counterparty addresses
Add addresses on the “Addresses” tab of the counterparty card: the address type determines where it is filled into documents.
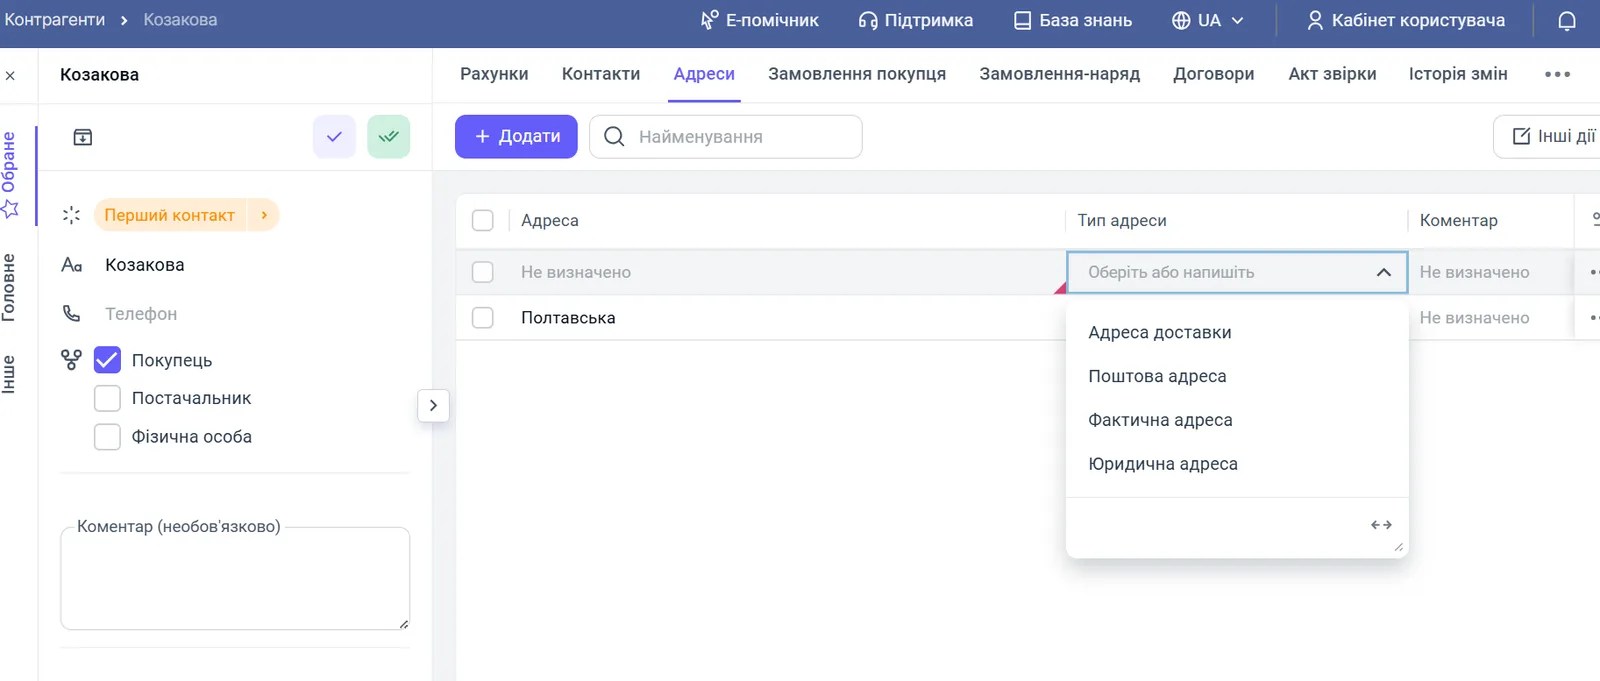
- Open Counterparties, select the counterparty and go to the “Addresses” tab.
- Click Add.
- In the “Address” column, enter the address.
- In the “Address type” column, select a type from the list.
- If needed, fill in the “Comment” and describe when to use this address.
| Address type | Purpose |
|---|---|
| “Legal address” | The registration address; it goes into official documents, invoices and statements |
| “Actual address” | Where the counterparty’s office is physically located |
| “Mailing address” | Where to send original documents by mail or courier |
| “Delivery address” | The customer’s warehouse or store where you deliver goods |
The number of addresses of each type is not limited, which is convenient for chain customers: in an order, the manager selects the needed point from the list.
You do not have to enter a delivery address in advance. If you specify a new address in the “Delivery” section of a customer order, Bimp adds it to the counterparty card with the “Delivery address” type after you save the order. See Customer order.
Can the same EDRPOU be used for several counterparties
Yes, but only for related counterparties. Bimp does not let you save an EDRPOU code that another counterparty already has, unless the “Parent counterparty” link is set between them.
- Create counterparty 1 and specify its EDRPOU, for example 11223344.
- Create counterparty 2 and in the “Parent counterparty” field select counterparty 1.
- Now you can enter the same EDRPOU 11223344 for counterparty 2.
What to do next
After saving the card, add a contract on the “Contracts” tab: orders and invoices are created based on it, see Customer contract and Supplier contract. A large list of counterparties can be loaded from Excel, see Importing counterparties.
FAQ
Can one counterparty be both a customer and a supplier?
Yes. In the "Counterparty type" field you can tick several types at once: "Customer", "Supplier", "Individual". The type determines which documents are available for working with the counterparty.
Why can't I save a counterparty with a company registry code (EDRPOU) that already exists in the database?
The same EDRPOU code is allowed only for related counterparties. In the second counterparty's card, select the first one in the "Parent counterparty" field, and then the code can be saved.
How do I add several delivery addresses for one customer?
Open the "Addresses" tab in the counterparty card and add as many rows with the "Delivery address" type as you need. The number of addresses of each type is not limited.
Where are reconciliation statements with a counterparty stored?
On the "Reconciliation statement" tab of the counterparty card: it shows all statements and the history of settlements.