
Storage locations: address-based storage in a warehouse
On this page
Storage locations are a directory of racks, shelves and bins that products are assigned to. Create them under **Directories → Storage locations** (type "Bin" or "Bin group"), then in the product card on the "Storage locations" tab add a warehouse, a bin and a priority. This way the storekeeper sees where to put goods and where to take them from.
Why you need storage locations
Storage locations let you keep address-based records: each product is assigned to a specific rack, shelf or bin. A new employee sees from the invoice where to put the goods, and a packer follows a clear route when picking an order. The inventory management overview gives the big picture of warehouse documents and settings.
Examples: a semi-finished goods warehouse sets aside a dry zone for batteries; an online store assigns each bag size and label to a separate bin.
Setup has two stages: creating the structure in the directory and assigning products in the product card.
How to create storage locations
-
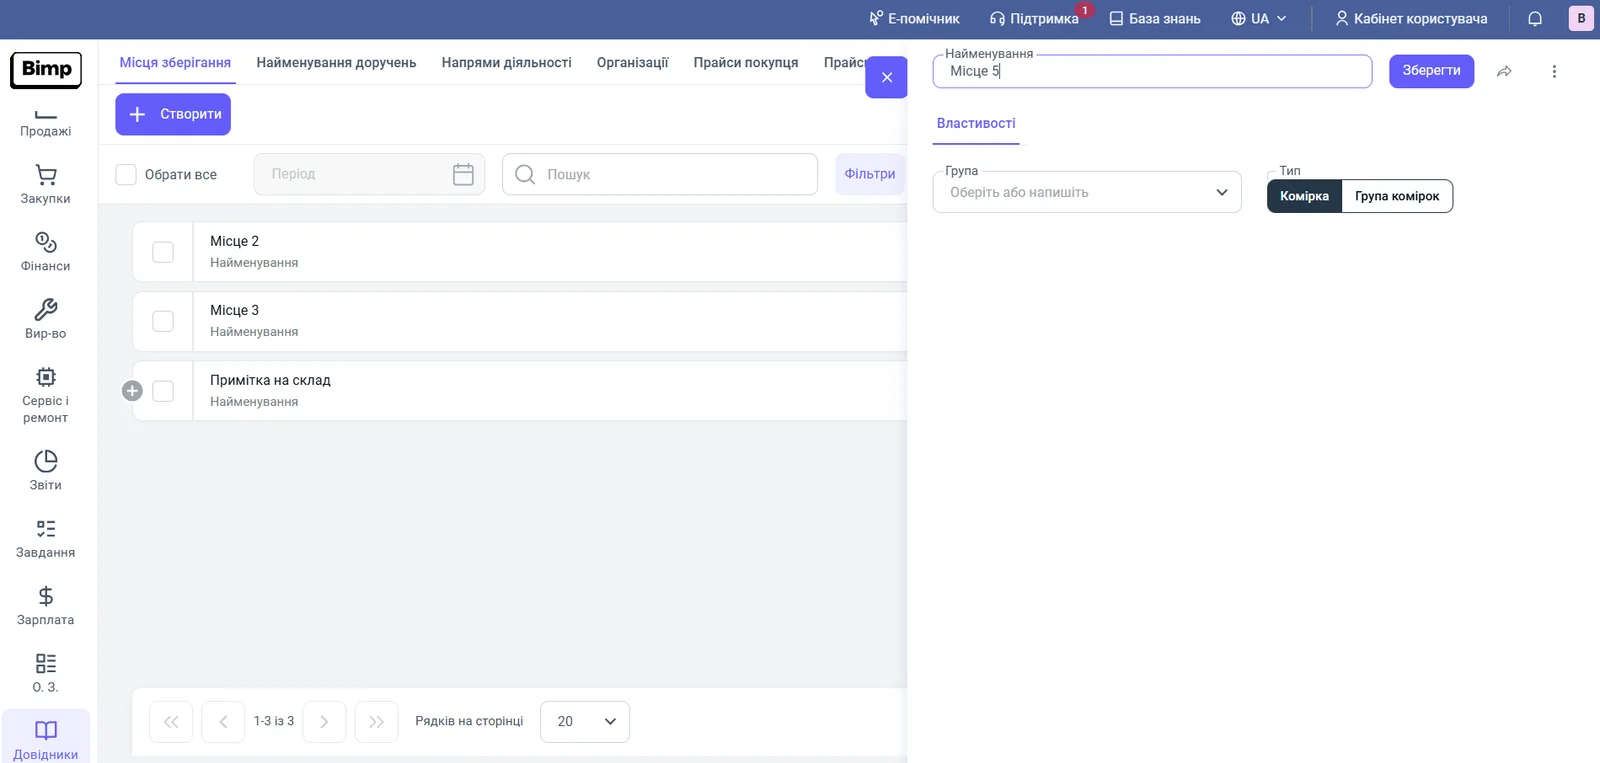
Open Directories and the Storage locations tab, then click Create.
-
In the “Name” field, enter a name that follows your internal logic: “Rack 1”, “Shelf A”, “Bin 3”.
-
In the “Type” switch, choose “Bin group” if you will add other locations inside it (for example, a rack), or “Bin” for the final storage location.
-
In the “Group” field, choose the parent group if the location belongs to one.
-
Click Save.
How to assign a product to a storage location
- Open Warehouse → Products and services and the card of the product you need.
- Go to the Storage locations tab and click Add.
- In the “Warehouse” field, choose a warehouse, for example “Main warehouse”.
- In the “Storage locations” column, choose a bin created in the directory.
- Specify the “Priority” (0 by default). It is useful when a product is stored in several places and one of them is the main one.
- Save the card with the check mark in the top bar.
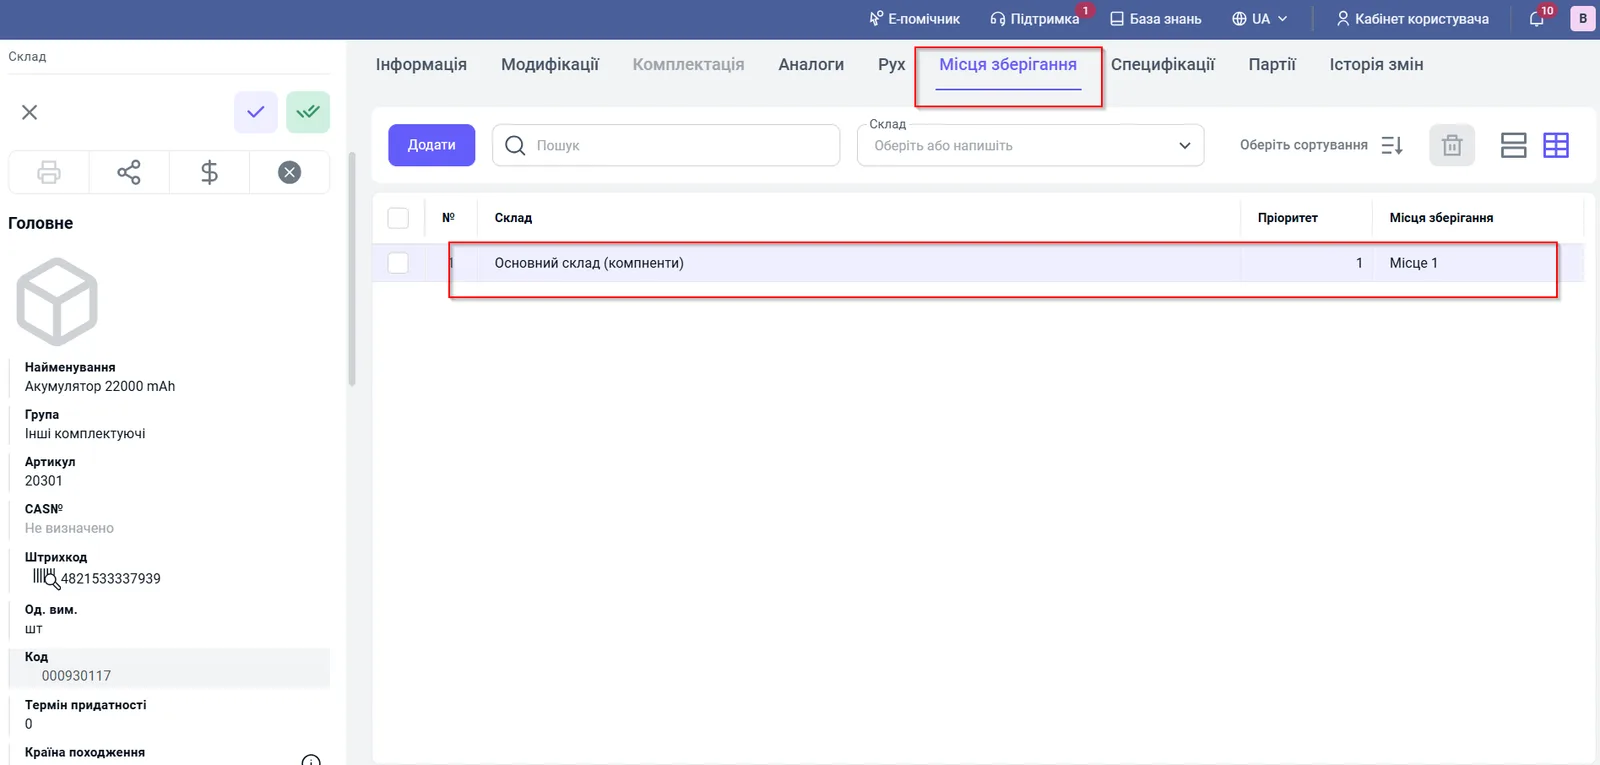
You can assign one product to several locations on different warehouses: the system supports unique addresses for each location.
How to check that all products have an address
After assigning locations, run the “Product balances without address” report. Items that appear in it after a delivery is received are either not assigned to a bin in the card or were received without an address. Unoccupied bins are shown by the Empty storage locations report. Also run a stock count to keep the data up to date.
FAQ
Can I assign several storage locations to one product?
Yes. Add several rows on the "Storage locations" tab of the product card, even on different warehouses. Mark the main location with a lower or higher priority, depending on your rules; the default priority is 0.
How do I find products that have no address?
Run the "Product balances without address" report. If an item appears in the report after goods were received, it has not yet been assigned to a bin.
More about this in Bimp: Warehouse management in Bimp