
Customer order: how to issue an invoice for goods and services
On this page
A Customer order in Bimp is an invoice and a sales plan at the same time: it reserves the goods, schedules the incoming payment and is the basis for the next documents (sale, certificate, waybill). To create one, open "Sales → Orders", click "Create", choose the customer, warehouse and price list, add the items and save the document.
When you need a Customer order
Create a Customer order every time a customer wants to buy something: they asked for an invoice, placed an order on the website or agreed on a purchase with a manager. In Bimp, one order does three jobs:
- Invoice. The print form of the order is the invoice for the customer (PDF or Excel).
- Goods reservation. The quantity from the order is reserved in the warehouse, so another manager cannot sell the same goods.
- Plan for money and shipping. The expected payment goes into the payment calendar, and with one click you can create a sale, a certificate of completed work and a waybill based on the order.
Example. The customer LLC “Bud-Master” asks for an invoice for 50 bags of cement. The warehouse has 100 bags. The manager creates an order for 50 pcs: they move to reserve, the customer receives the invoice as a PDF, and 50 bags remain in the free stock.
Before you start
Check that the following already exist in the directories:
- the customer: see Counterparty card;
- goods or services: see Products and services;
- the warehouse and price list: see Warehouses and Price lists;
- for non-cash payment, the company’s bank account; for cash, a cash desk: Bank accounts and cash desks.
If a value is missing from the drop-down list of a field, first add it to the corresponding reference list. The whole sequence, from order to payment, is described in the sales process overview. If an order does not save after you change a discount, see the “Data is filled in incorrectly” error.
How to create a Customer order
-
Open Sales → Orders and click Create. You can do the same from the Dashboard with the Order button.
-
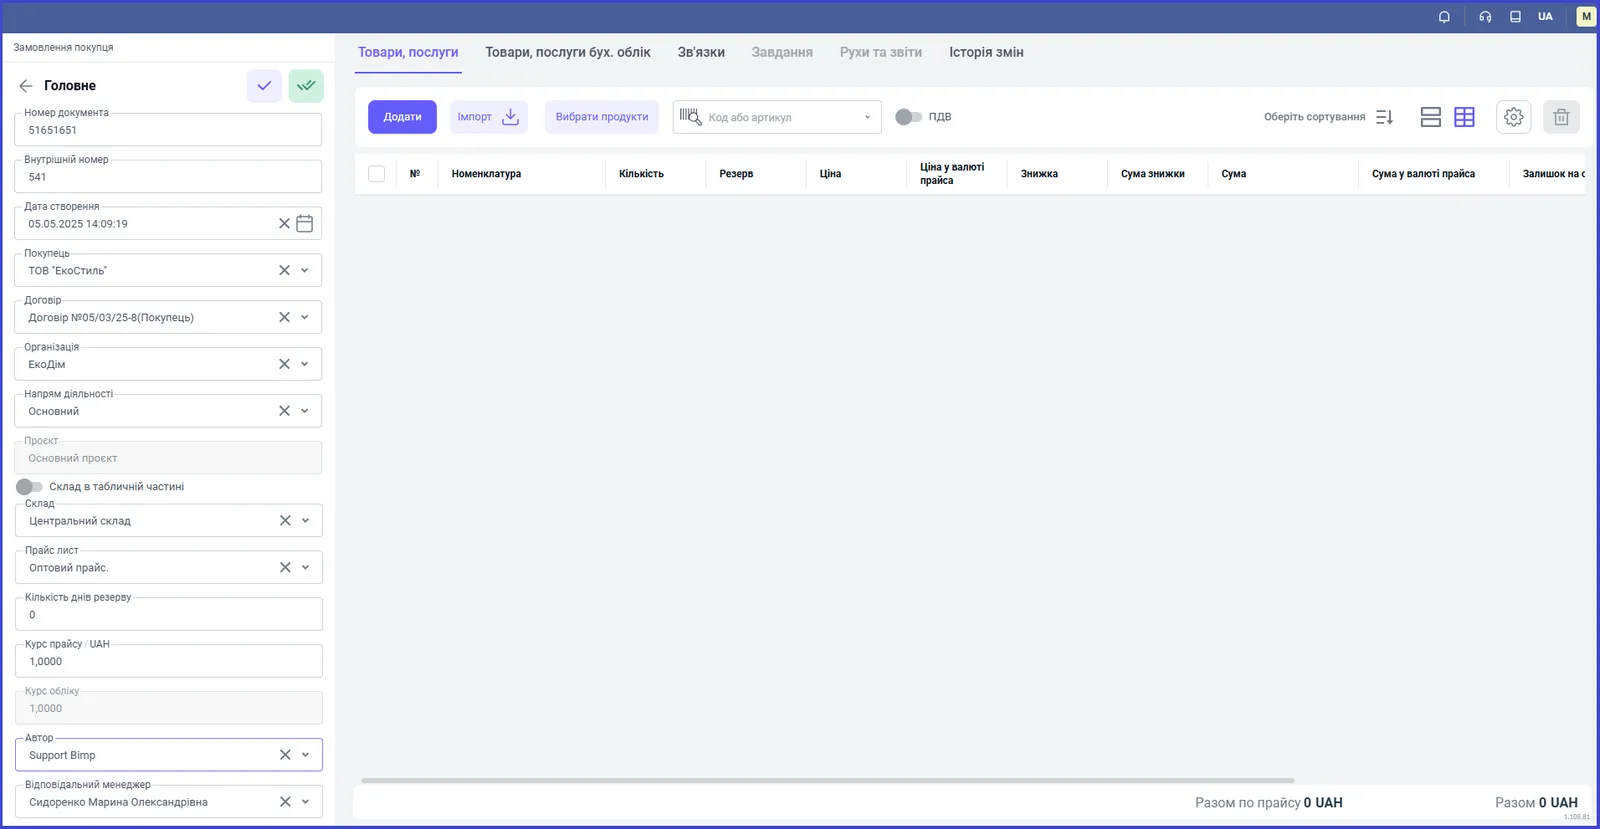
Fill in the “Main” panel on the left:
- “Document number”: the system assigns it automatically, or enter your own;
- “Creation date”: the current date; you can change it to a past date, but not to a future one;
- “Customer”: choose from the list; “Contract” is filled in automatically if a contract with the customer already exists;
- “Organization” and “Line of business”: on whose behalf you sell and which line of business the sale belongs to;
- “Warehouse”: where you will ship the goods from;
- “Price list”: prices are filled in from it;
- “Reservation days”: how many days to hold the reservation; 0 means an open-ended reservation;
- “Price list rate”: needed only if the price list is in a currency other than the accounting currency; for a hryvnia price list leave 1;
- “Author” and “Responsible manager”.
-
On the “Goods, services” tab, add items in one of the ways described in How to add goods and services.
-
Save the order with the checkmark button at the top of the left panel. The order gets the status “New”.
How to add goods and services
You add order items on the “Goods, services” tab in three ways.
One item at a time. Click Add and find the product or service in the “Products and services” field by name, barcode or article. It is faster to scan a barcode or enter the code in the “Code or article” field. If the item is not in Bimp yet, click Create right in the “Products and services” field: the new item is saved in the “Products and services” reference list.
Several items at once. Click Select products, tick the items you need (for services, choose the type “Service”), enter the quantity and price, and click Transfer to document.
A list from Excel. Click Import, choose the file, check the data and click Confirm. For the file format, see What you can import into Bimp.
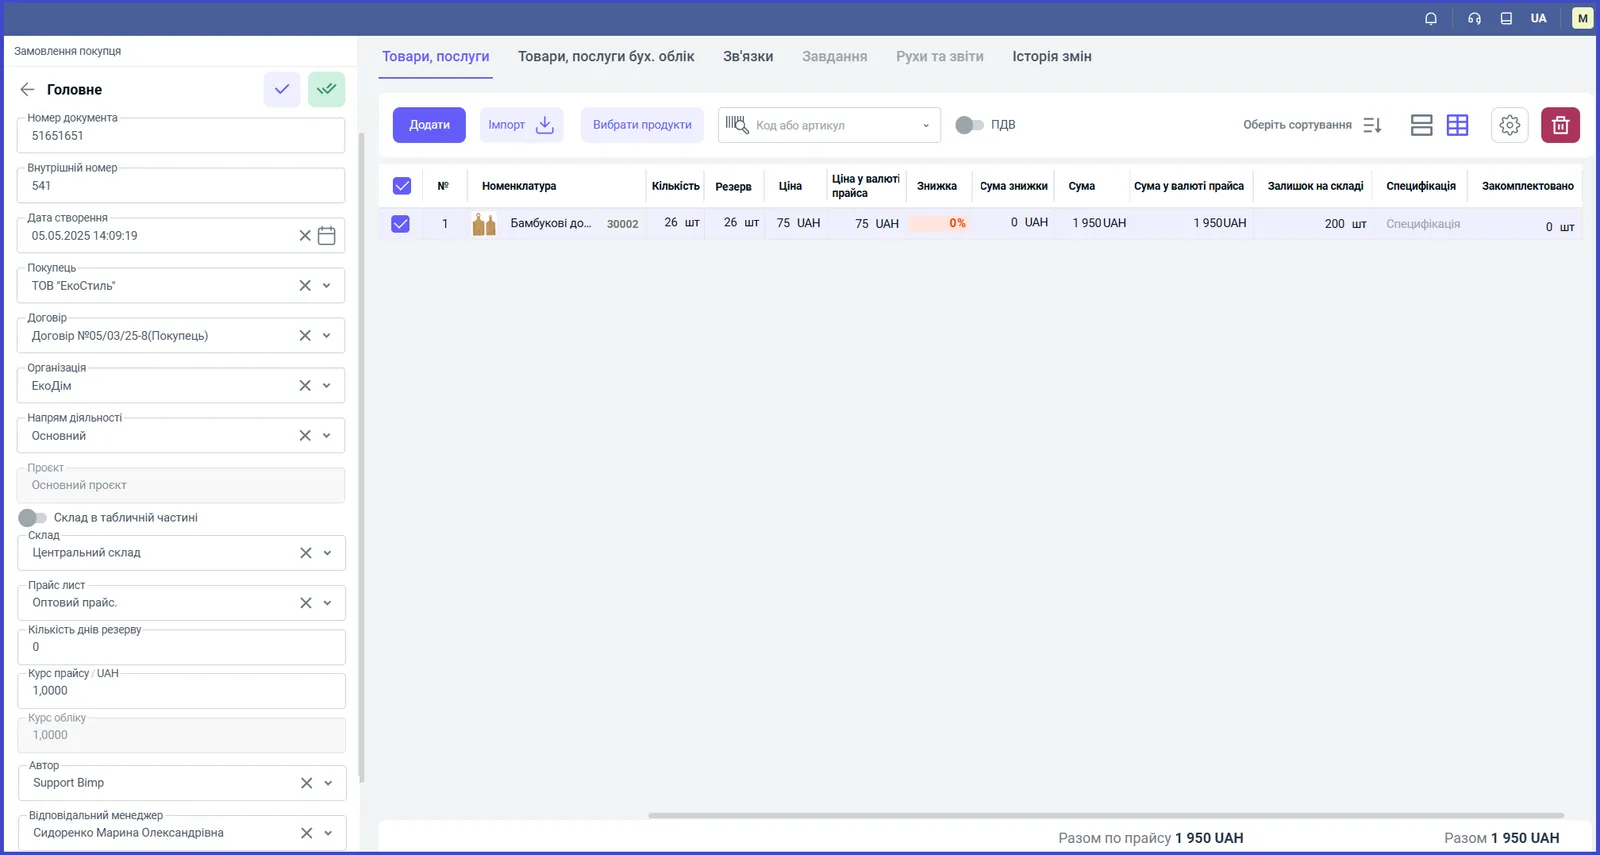
For each row, Bimp fills in:
| Column | What it means |
|---|---|
| “Quantity” | how much you are selling |
| “Reserve” | how much of this quantity is reserved in the warehouse; by default equal to the quantity if the goods are available |
| “Price”, “Price in price list currency” | the price from the price list; you can change it manually |
| “Discount”, “Discount amount” | a discount as a percentage or an amount |
| “Amount” | calculated automatically |
| “Warehouse stock” | how much of the goods is currently in the selected warehouse |
| “Specification”, “Assembled” | for goods that are manufactured according to a specification |
How to set up payment
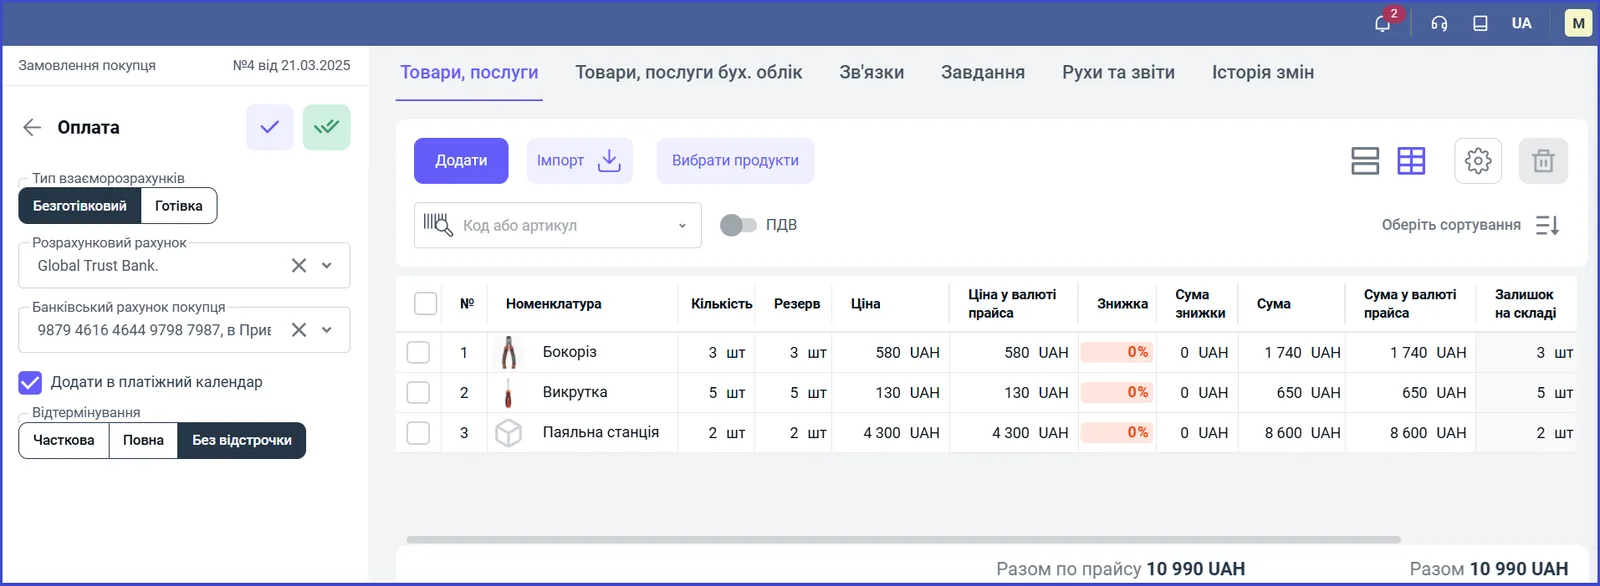
The “Payment” block defines how the customer will pay and when to expect the money.
- Hover over the “Payment” section in the left panel and click Edit.
- In the “Settlement type” field, choose Non-cash or Cash.
- For non-cash settlement, specify the company’s “Bank account” and the customer’s “Customer bank account”.
- For cash, choose how the payment is received: a cash desk or a card.
- Tick “Add to payment calendar” so that the expected payment appears in the payment calendar.
- In the “Deferral” field, choose:
- No deferral: the customer pays immediately;
- Full: the whole amount in one payment, but later;
- Partial: several payments on set dates.
- Save the changes with the checkmark.
The lists show only the accounts and cash desks that already exist in the directories. You can receive PrivatBank and Monobank statements automatically: see Automatic exchange with banks.
How to fill in delivery
Hover over the “Delivery” section, click Edit, enter the delivery details and save with the checkmark. If Nova Poshta is connected, you can create a waybill right from the order.
What happens after saving
After you save a Customer order:
- the goods in the “Reserve” column are reserved and do not count towards free stock: see Reserving goods;
- the expected payment is visible in the payment calendar (if you added it there);
- the order has the status “New”; you change the status manually or automatically: see Order statuses;
- the “three dots” menu in the document header offers printing, copying and other actions; the invoice for the customer is printed from there: see Printing sales documents.
Next, you usually create the following from the order:
- Customer payment: when the customer has paid;
- Sales of goods and services: when you have shipped the goods;
- Certificate of completed work: for services.
All of them are created with the Create based on button in the order, without re-entering the items: see Creating a document based on another.
FAQ
How is an invoice different from a Customer order in Bimp?
It is not different: Bimp has no separate "Invoice" document. An invoice is a print form of the Customer order. That is why the goods are reserved together with the invoice, and the expected payment goes into the payment calendar.
Can I issue an invoice for goods that are not in stock?
Yes. If the goods are not available, no reservation is created. To reserve the goods after they arrive from the supplier, use booking. See the article "Selling goods that are not in stock".
How do I release the reservation if the customer cancels the order?
Change the order status to cancelled, or set up the status so that it releases the reservation automatically. For details, see the article "Order statuses".
Can I create an order with a future date?
No, a Customer order cannot be dated in the future. This protects against selling in advance by mistake.
More about this in Bimp: Sales in Bimp