
Adding a supplier: counterparty card and contract
On this page
A supplier in Bimp is a counterparty with the "Supplier" type. To add one, open "Counterparties" (or "Directories → Counterparties and individuals"), click "Create", fill in the name, select the "Supplier" type, save the card and create a contract. Without this type, the counterparty will not appear in a supplier order.
When you need to add a supplier
Add a supplier before the first purchase: a counterparty with the “Supplier” type can be selected in a supplier order, a goods receipt and a supplier payment. If the company is already a customer in Bimp, you do not need to create a new card. Just add the “Supplier” type to it. The full purchasing process from order to payment is covered in one article.
How to create a supplier card
You create the card in the “Counterparties” module or in the directory.
-
Open Counterparties and click Create. Or open Directories, go to the “Counterparties and individuals” tab and click Create.
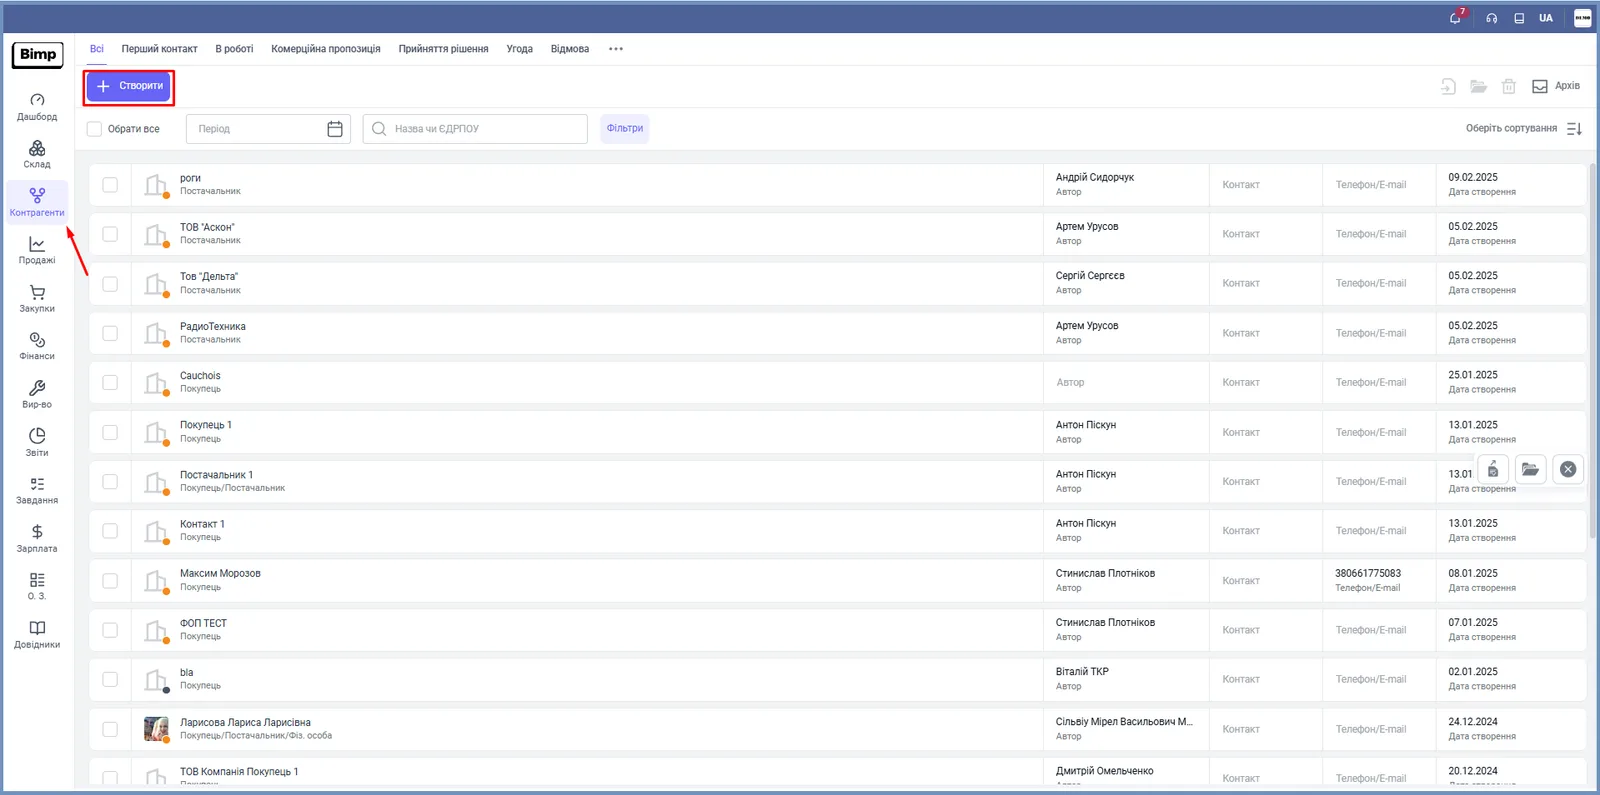
-
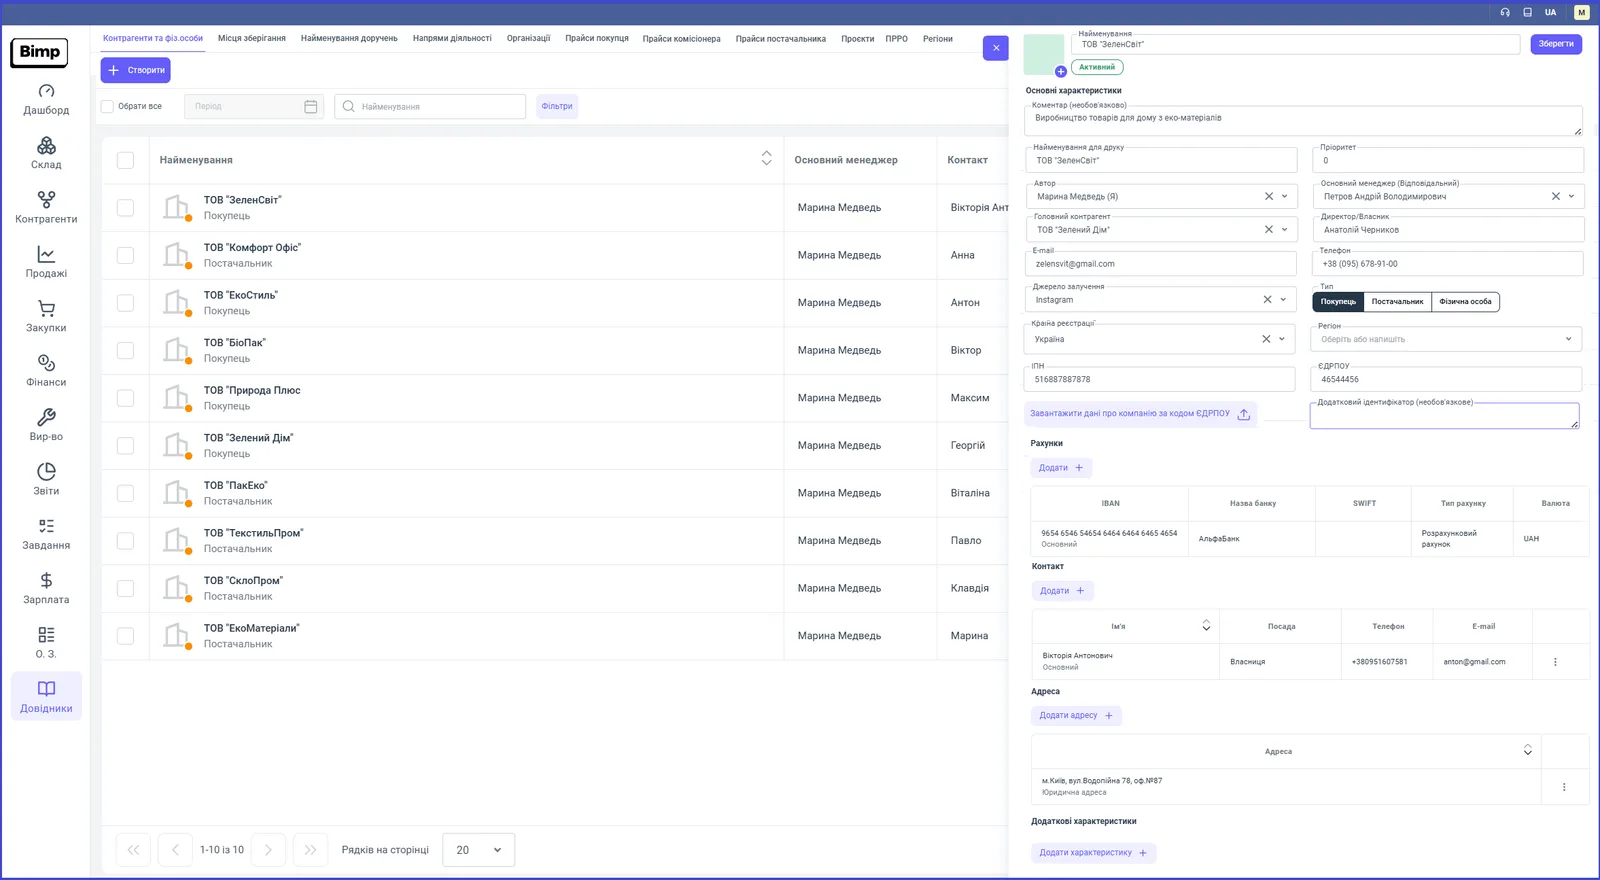
In the “Name” field, enter the name. Optionally add a logo (a file up to 10 MB, up to 1200 pixels) and a “Comment” (up to 1000 characters).
-
In the “Name for printing” field, enter the full legal name.
-
Select the “Author” and the “Main manager (Responsible)”. If the supplier belongs to another company, specify the “Parent counterparty”.
-
Fill in “Director/Owner”, “Phone”, “E-mail” and “Source of acquisition”.
-
In the “Type” field, select Supplier. You can select several types at once.
-
Specify “Country of registration”, “Region”, “Tax ID (IPN)” and “EDRPOU”. The “Load company data by EDRPOU code” button fills in the details automatically.
How to fill in bank accounts, contacts and address
Add financial and contact details in the lower blocks of the card.
- In the “Accounts” block, click Add and enter the IBAN, bank name, SWIFT, account type and currency. Supplier accounts make it easier to create payments.
- In the “Contact” block, add the name, position, phone and e-mail of the responsible person.
- In the “Address” block, add the legal and actual addresses. They are needed for contracts and certificates of completed work.
- Enter any additional details that have no dedicated field in “Additional characteristics”.
- Click Save in the top right corner.
After saving, the card appears in the “Counterparties” and “Directories” lists. For more on the card fields, see Counterparty card.
How to create a contract with a supplier
You create a contract in the supplier card with the Create contract button. Supplier orders, goods receipts and payments are based on it.
-
Open the supplier card and, on the “Documents” tab, click Create contract (bottom right corner).
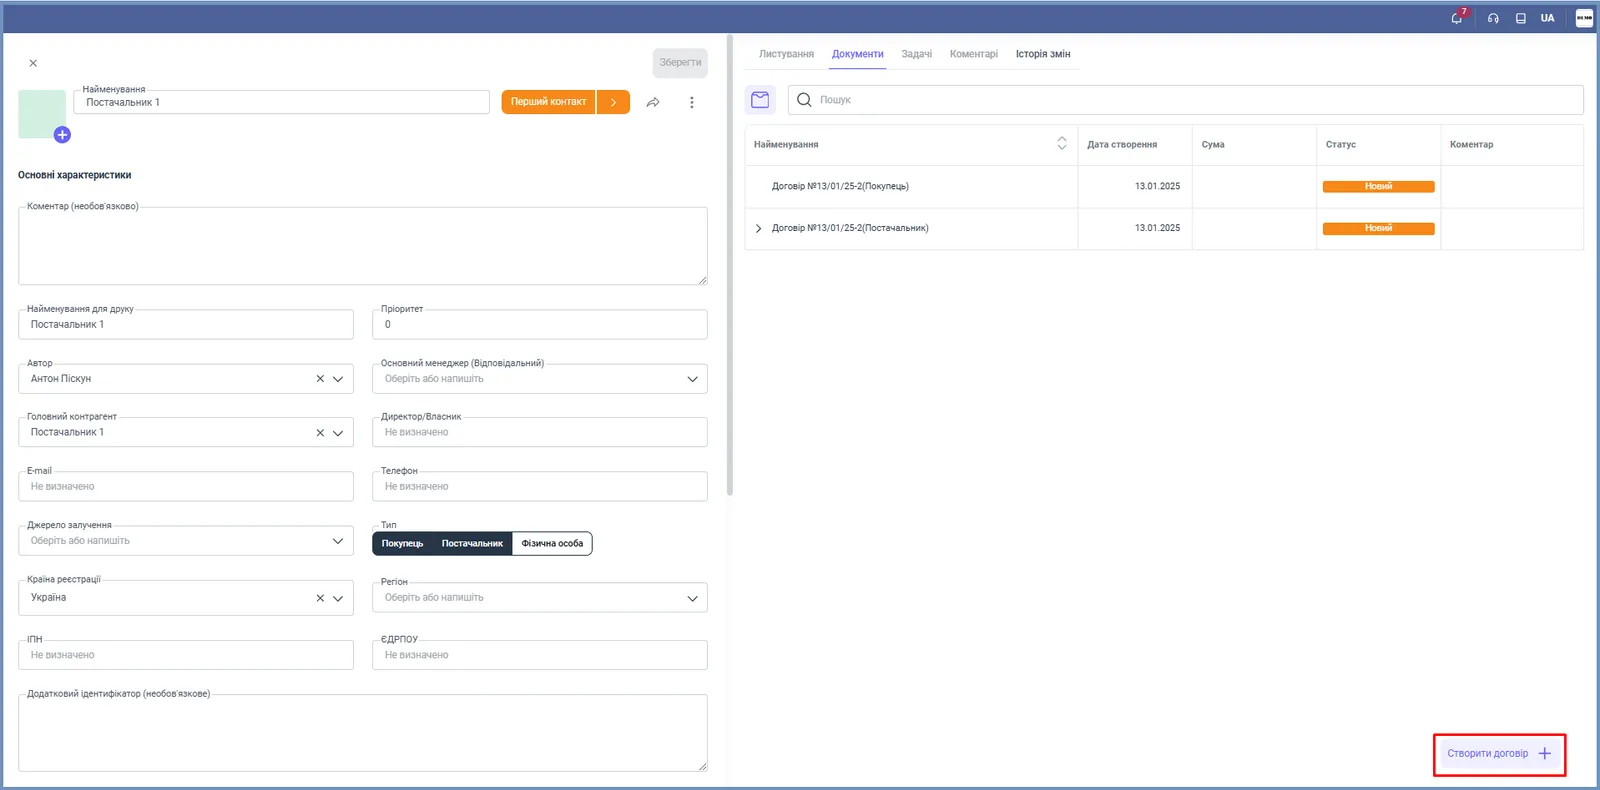
-
Fill in the form: “Counterparty”, “Organization”, “Line of business”, “Project”, “Contract date”, “Currency”, “Number of days of deferral”, “Price list”. In the “Contract” switch, select With supplier.
-
In “Contract type”, select “Main” or “Not main”. A new contract is not main by default; the main contract is filled into documents automatically.
-
Click Save.
The contract currency determines the purchase currency, so create a separate foreign-currency contract for a foreign supplier. For contract setup in different scenarios, see Contract with a supplier.
How to import suppliers from Excel
You can upload a ready list of counterparties from Excel using the Bimp template.
- Open Directories → Counterparties and individuals and click Import.
- Select the prepared Excel file. The template contains examples of how to fill it in.
- Check the data and confirm the import. Bimp creates the records.
For the file format and column mapping, see Importing counterparties from Excel.
FAQ
Why is the supplier missing from the list in a supplier order?
The "Supplier" type is not selected in the counterparty card. Open the card, enable this type in the "Type" field and save.
Can one counterparty be both a customer and a supplier?
Yes. In the "Type" field you can select several types at once: "Customer", "Supplier", "Individual".
What does the "Main" contract do?
The main contract is filled into documents automatically when you select this supplier. A new contract is "Not main" by default.
Can I upload a list of suppliers from Excel?
Yes. In "Directories → Counterparties and individuals" click "Import", select a file based on the Bimp template, check the data and confirm.
More about this in Bimp: Procurement in Bimp