
Importing a bank statement from a file and the universal template
On this page
You can upload a bank statement to Bimp as a file: open "Finance → Transactions", click "Client-Bank", select the "From file" source, upload the statement, choose the bank and click "Import". A single upload can cover no more than 30 days. For banks without a dedicated format, use the universal template.
When you need to import a statement from a file
Import from a file is needed when you have to bring bank transactions into Bimp without entering each payment manually, and there is no automatic exchange with the bank. After the import, all transactions appear in the “Transactions” list and wait to be allocated. Automatic statement upload is set up separately: see Automatic exchange with banks. All articles in this section are listed on the “Finance” page.
How to upload a statement from a file
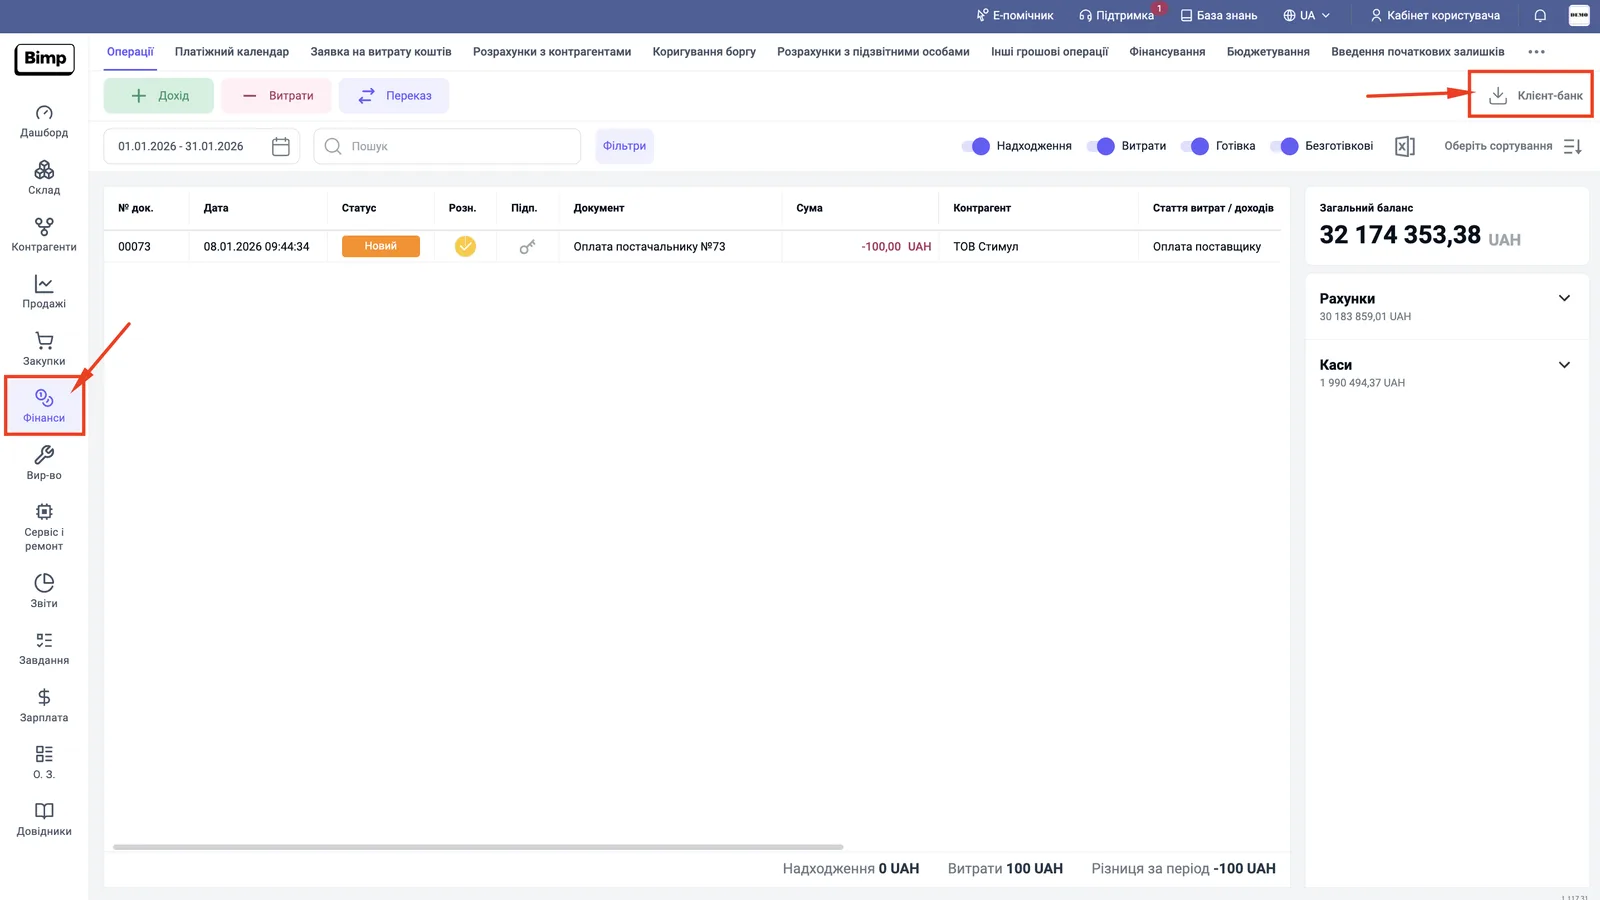
You upload a statement from Finance → Transactions with the Client-Bank button.
-
Save the statement from online banking as an Excel file (.xls). The period in the file must be no more than 30 days.
-
Open Finance → Transactions and click Client-Bank in the upper right corner.
-
In the right panel, in the “Data source” field, select From file and click Upload.
-
Select the statement file in the file explorer. The “File import” window opens with the name of the selected file.
-
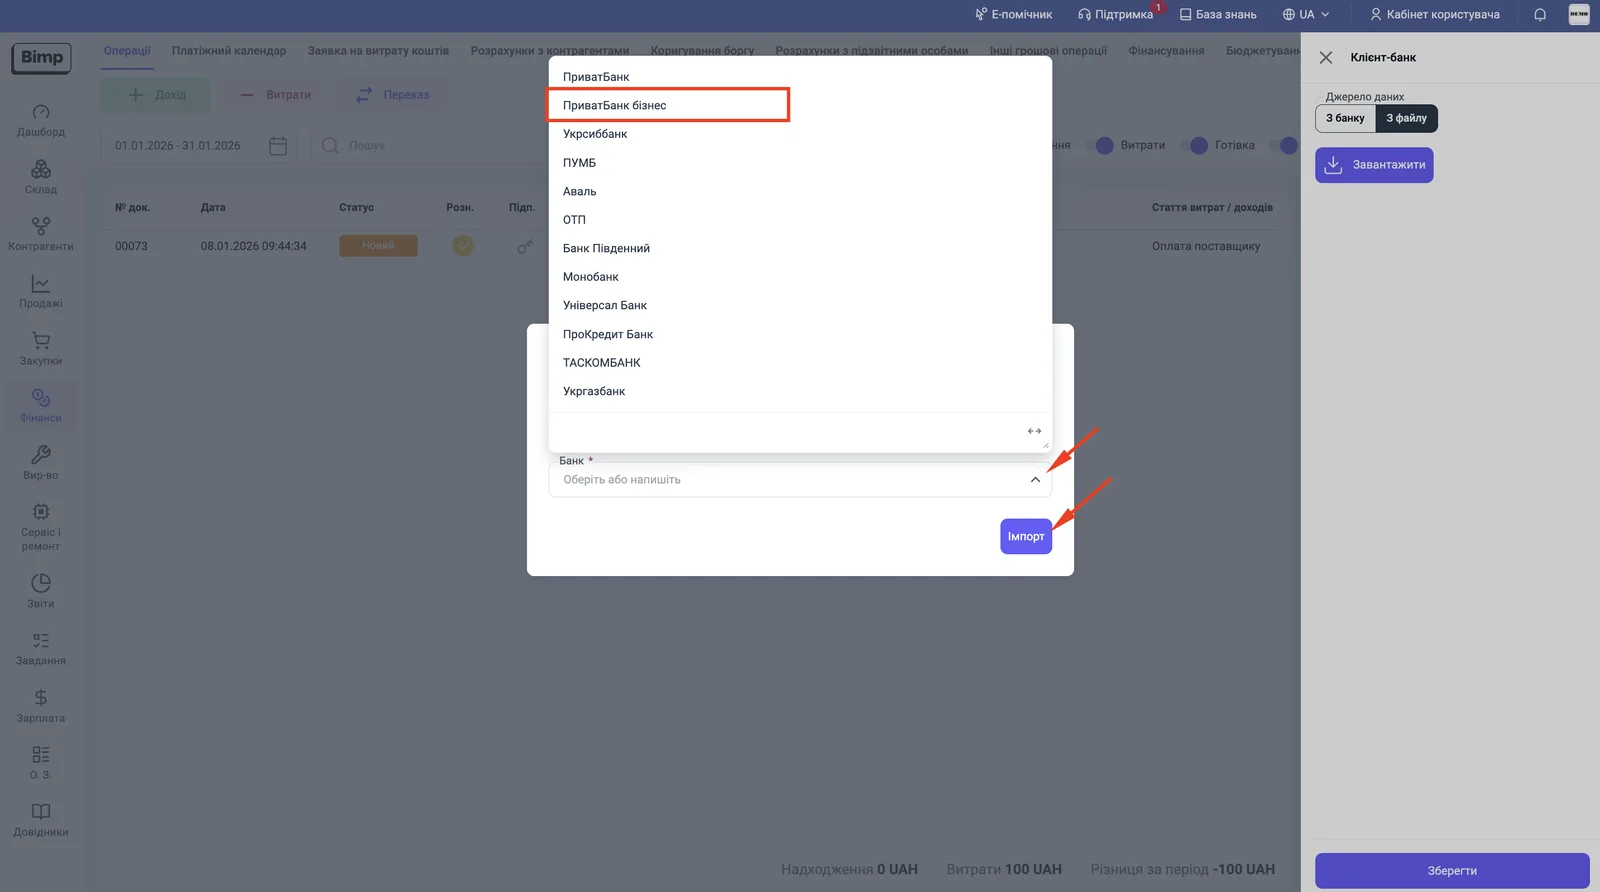
In the “Bank” field, select the bank whose statement you are uploading.
-
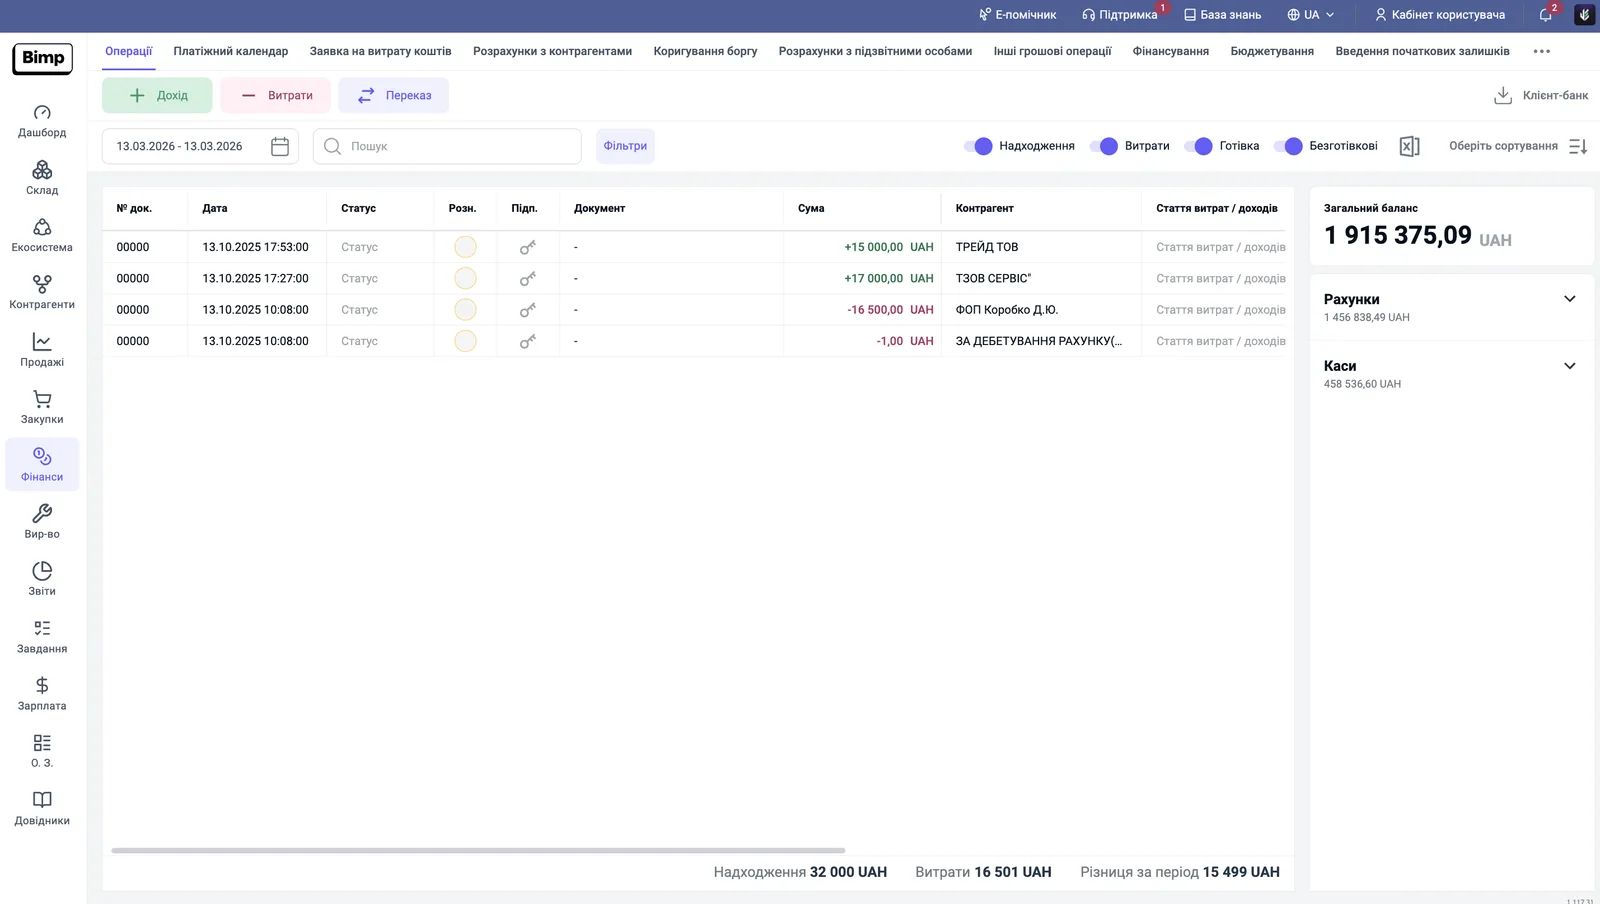
Click Import. After a few seconds, the transactions appear on the “Transactions” tab.
What happens after the import
After the import, new transactions have an empty circle in the “Alloc.” column: they are not allocated. The next step is to link them to items, contracts and orders: Allocating bank statement transactions.
How to upload a statement with the universal template
The universal template lets you upload a statement from any bank, even if there is no dedicated format for it: you need to bring the data into the template structure.
- Prepare an Excel file according to the template. The second row must contain a heading like “Statement for account No. UA…” with the account number (IBAN) after the “No.” symbol: Bimp uses it to identify the account.
- Fill in the required columns: reference (a unique transaction identifier), amount and currency. If there is no reference, fill in the first column “No.”: Bimp will use the row number as the identifier.
- If possible, specify the counterparty and their account. The minimum set of data is enough for the statement to appear in the system, but a missing counterparty will have to be entered manually during allocation.
- Upload the file the same way as in the previous section and select the universal (general) template.
How Bimp filters out duplicates
Bimp does not upload a transaction a second time if its identification code matches one that already exists. The code is formed as [BankCode]_[AccountNumber]_[Reference], where the bank code depends on the statement format:
| Format | Bank prefix |
|---|---|
| PrivatBank | 1 |
| PrivatBusiness | 2 |
| Universal template | 0 |
Common problems
A file for a long period is not uploaded. Cause: the limit of 30 days per import. Save the statement as several files and upload them one by one.
PrivatBank is not recognized. Cause: a different statement format. Switch the statement type toggle in the import window.
A transaction from the universal template was not uploaded. Cause: the account number and reference match an existing transaction. Fill in unique references.
FAQ
What period can I upload a statement for?
No more than 30 days at a time. For a longer period, save several files in the bank (for example, one per month) and upload them one by one.
What file format should the statement be in?
Excel (.xls) is supported. If a PrivatBank statement is not recognized, switch the toggle for the old or new statement format in the import window.
What should I do if my bank is not in the list?
Use the universal template: enter the transactions in a file according to its requirements and upload it, selecting the universal (general) template.
Why were some transactions from the universal template not uploaded?
The system treats a record with the same account number and reference (or row number) as a duplicate and does not upload it a second time. This can happen if statements from different banks are uploaded through one template.
More about this in Bimp: Finance in Bimp