
Goods receipt from a supplier
On this page
The "Goods receipt" document records the receipt of goods or services from a supplier: it increases the warehouse balance and forms the cost price and the debt to the supplier. The fastest way is to create it based on a supplier order, with the "Create based on" button or an icon in the order journal; the supplier, contract and items are then filled in automatically.
What the “Goods receipt” document does
The “Goods receipt” document records the receipt of goods or services from a supplier in one place. After saving, Bimp:
- increases the product balance in the selected warehouse;
- forms the cost price of the received goods from the “Price” column;
- updates the liabilities to the supplier, which you close with a supplier payment.
How to create a goods receipt
There are three ways to create a goods receipt. The most convenient is based on a supplier order, because the fields are filled in automatically. To see where this step fits, read the overview of purchasing from order to payment.
- From a supplier order. Open the order, click Create based on in the top left part and select Goods receipt.
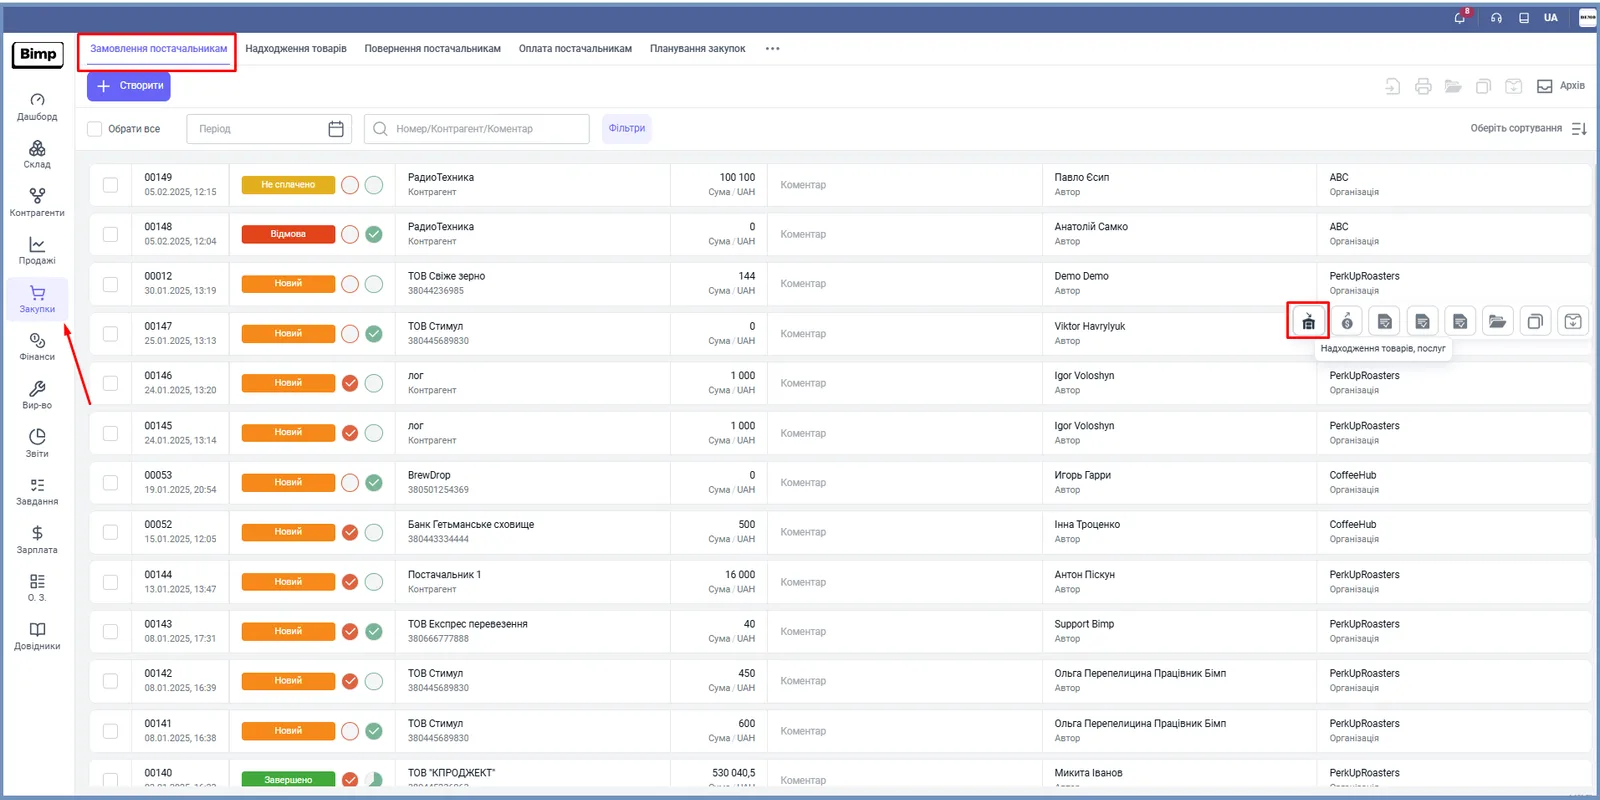
- From the order journal. Open Purchases → Supplier orders, hover over the order you need and select Goods receipt in the row of icons.
- Manually. Open Purchases → Goods receipts and click Create.
The form of a new document opens.
How to fill in a goods receipt
Fill in the left “Main” panel, then check the products table.
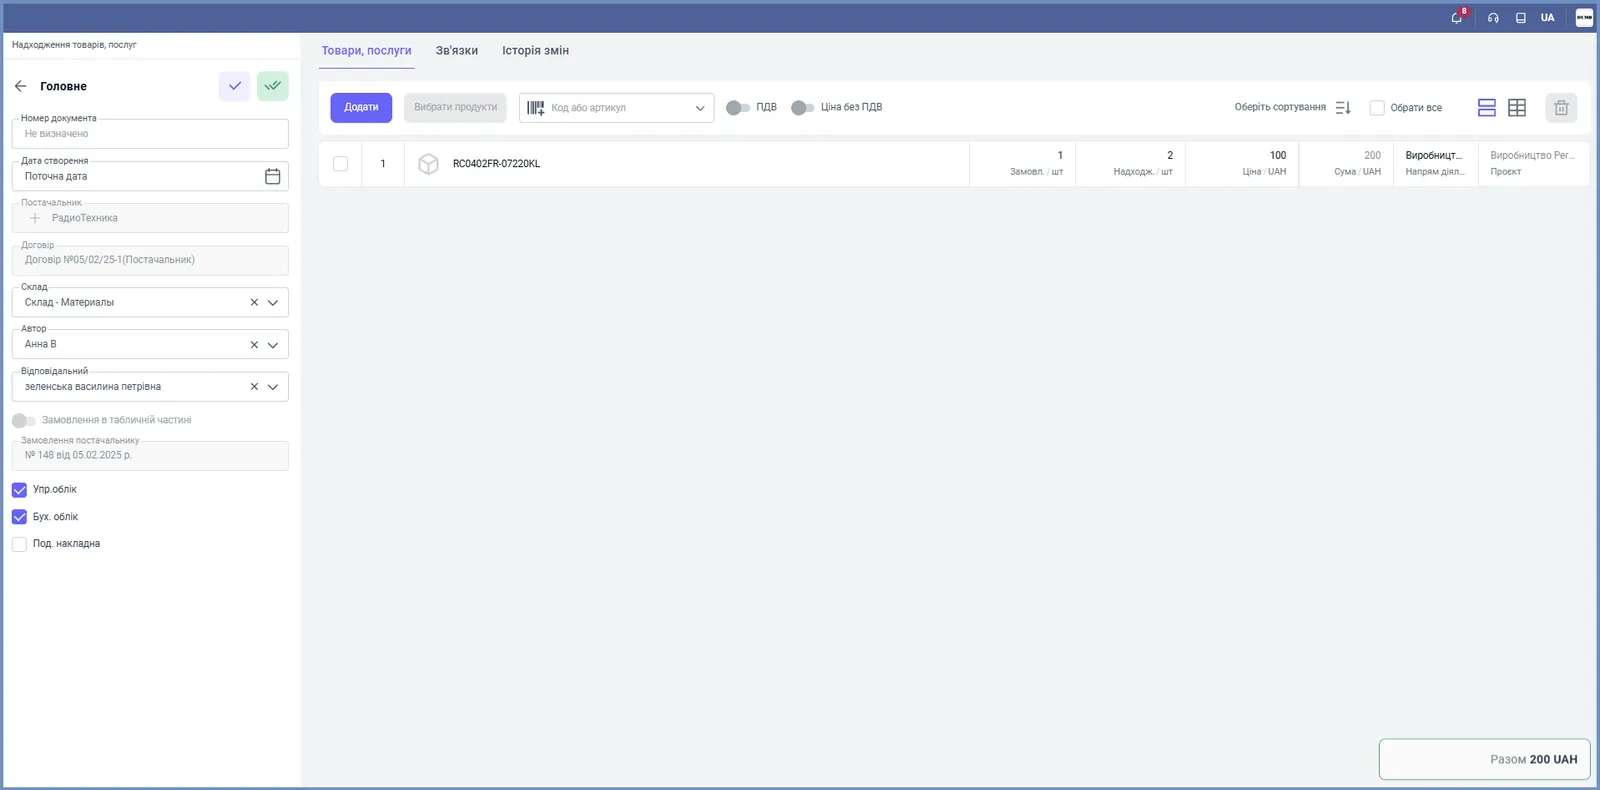
- “Document number”: the system assigns a number after saving, or enter your own.
- “Creation date”: the current date; you can change it.
- “Warehouse”: select the warehouse the goods will arrive in.
- “Author” and “Responsible”: the employees who carry out the operation.
- “Supplier”, “Contract” and “Supplier order”: filled in automatically from the supplier card and the order.
- If needed, add a “Comment”.
How to add and check items
If the goods receipt was created from an order, the products are already in the “Products, services” table: the “Ordered” column shows the ordered quantity and “Received” shows the received quantity. Change “Received” and “Price” if the actual delivery differs.
To add an item manually, enter the code or SKU, or scan the barcode, in the “Code or SKU” field. If the product is not yet in the directory, click Create at the bottom of the list, and the item is created right while you record the document.
The “VAT” and “Price excl. VAT” switches above the table work the same way as in the order: see VAT in a supplier order. If the product is tracked by serial numbers, see Goods receipt with serial numbers.
What happens after saving
Click the save button at the top of the left panel. The warehouse balance increases, and the cost price of the product is formed from the “Price” column.
What usually follows:
- Supplier payment, when you transfer the money;
- Additional costs, when there is delivery, customs duty or other costs for this delivery;
- Return to supplier, if part of the goods needs to be returned.
All these documents are created with the Create based on button in the goods receipt or from the journal icons.
FAQ
Can I record a goods receipt without a supplier order?
Yes. Open "Purchases → Goods receipts", click "Create" and fill in the supplier, contract, warehouse and items manually. When you create it from an order, most fields are filled in automatically.
Can I change the quantity and price in a goods receipt created from an order?
Yes. The items are pulled from the order, but you can edit the "Received" and "Price" columns if the actual delivery differs from the order.
Where do I record delivery, customs duty or other costs related to a receipt?
In a separate "Additional costs" document, which is created based on the goods receipt and increases the cost price of the goods. See the article "Additional costs on a goods receipt".
More about this in Bimp: Procurement in Bimp