
Goods receipt with serial numbers: two tracking modes
On this page
You enter serial numbers on receipt in the "Goods receipt" document: in strict mode through the row menu "Scan barcodes", in informational mode through the "Series" column. Both ways open the "Series creation" panel, where series are scanned or entered manually and then transferred to the document; you can view them in the product card: "Batches → Series".
Two series tracking modes on receipt
Bimp tracks series in two modes, and the mode determines how you enter numbers in the goods receipt document.
| Strict tracking (with balance control) | Informational tracking (without control) | |
|---|---|---|
| What it is for | Tracking each unit from receipt to sale: electronics, equipment, excise goods | Storing serial numbers for warranty or reference without blocking the warehouse |
| Where to open the series panel | The “three dots” menu next to the product → Scan barcodes | The cell of the “Series” column in the product row |
| What you get | A separate card for each series | Series linked to the delivery batch |
How to set up the mode is described in Tracking by serial numbers.
How to receive goods with strict series tracking
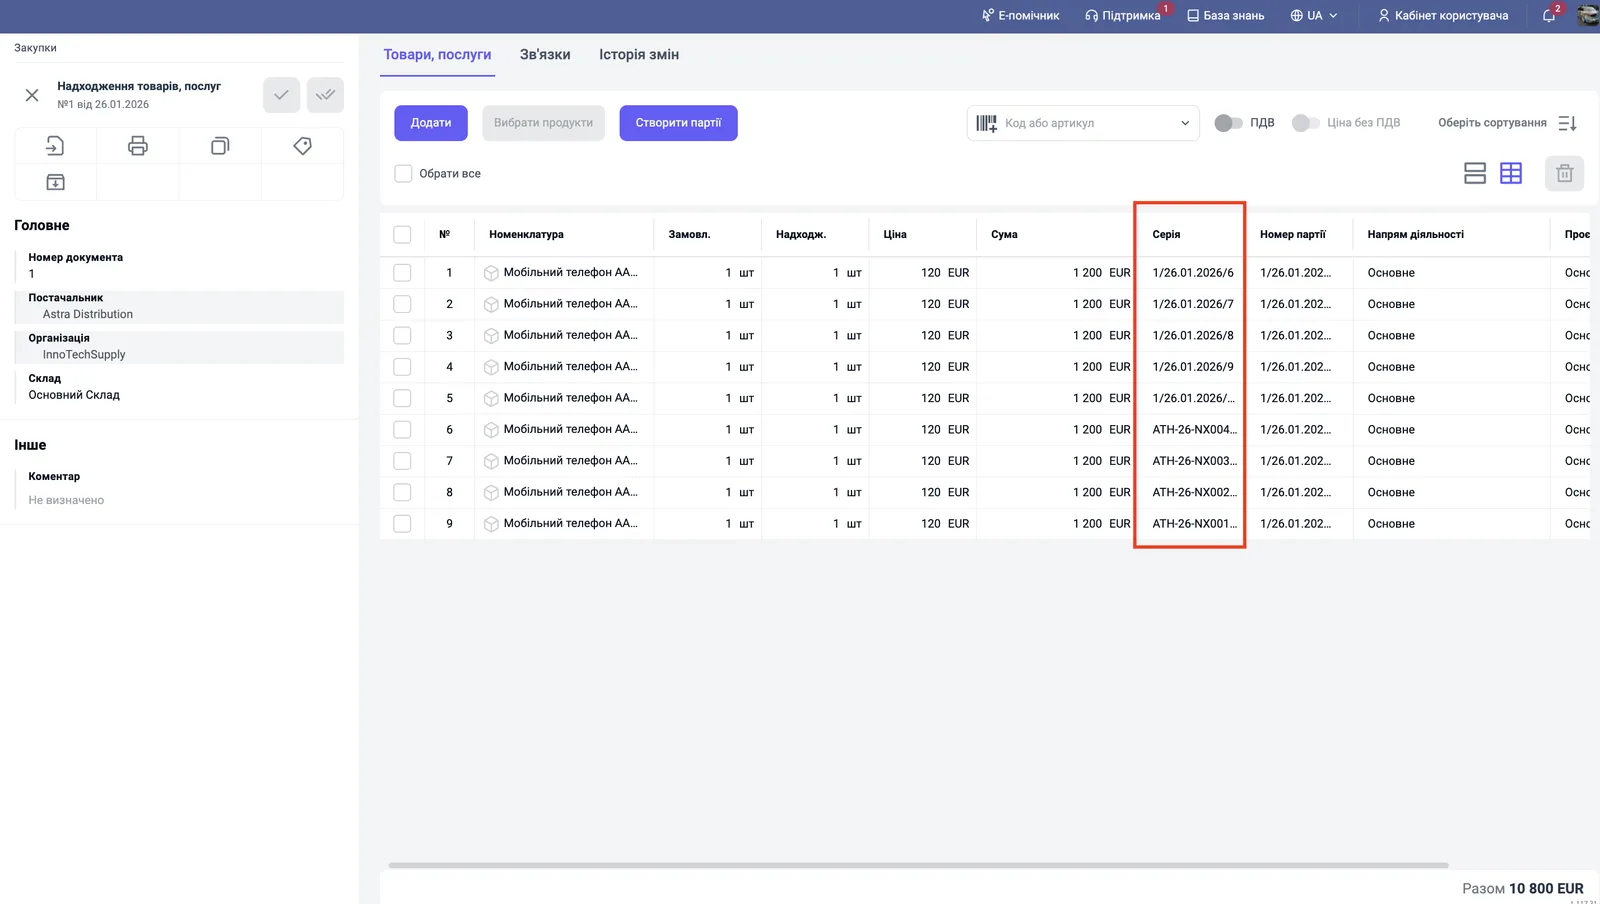
In strict mode, each unit gets its own series and a separate row in the document.
- Create a supplier order with the products and the total expected quantity.
- In the order, click Create based on → Goods receipt. The items and quantity are pulled in automatically.
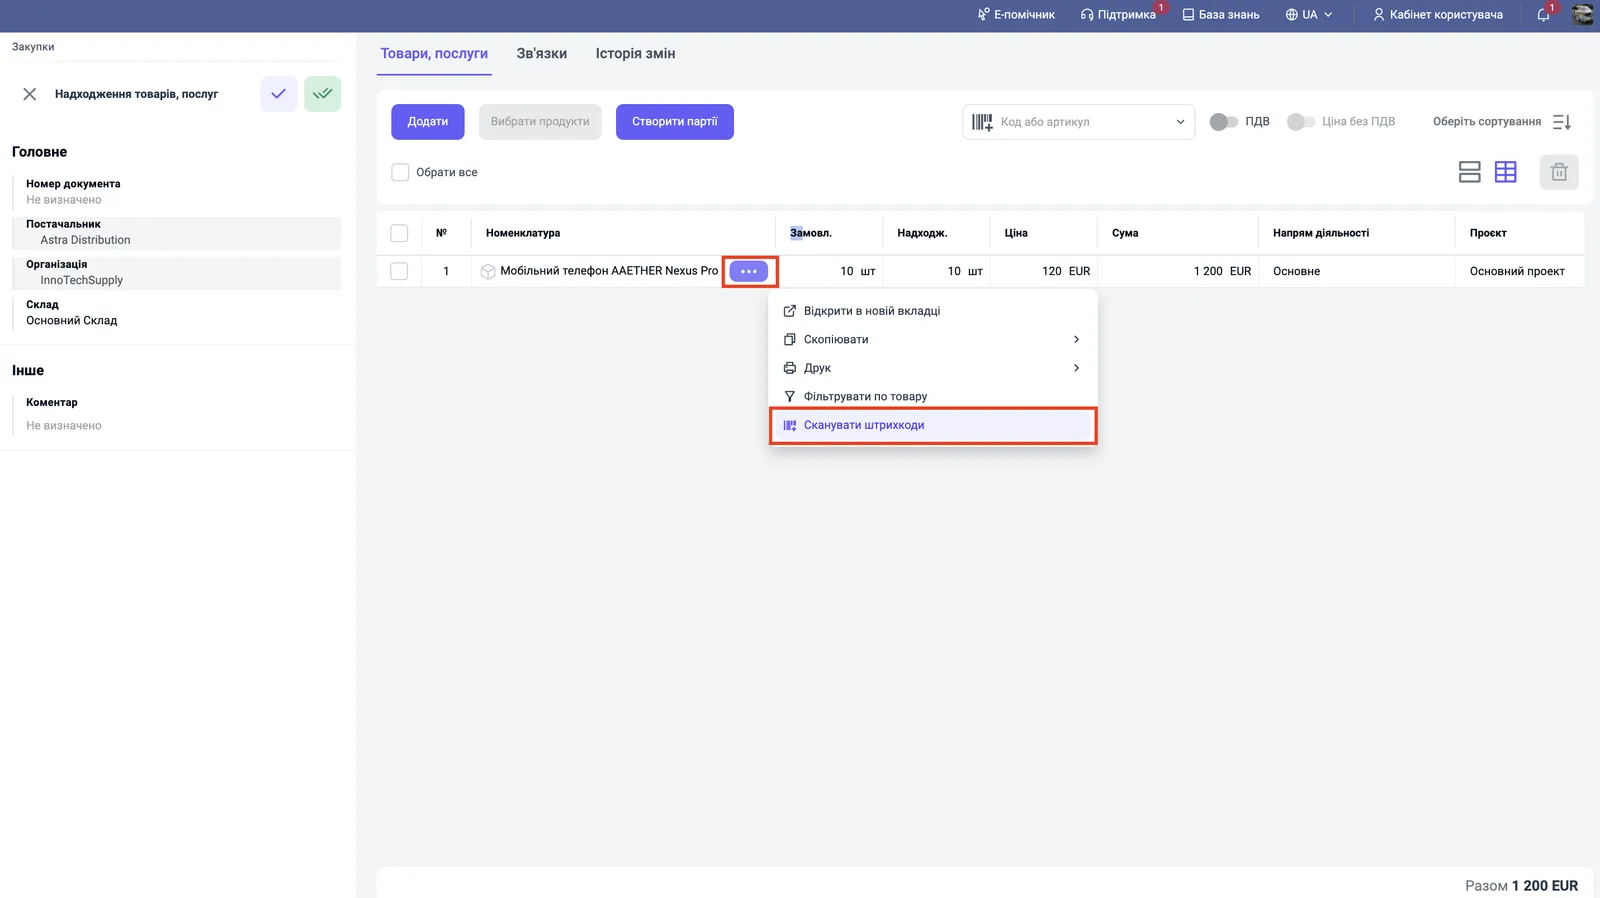
- In the “Products, services” table, click the “three dots” next to the product you need and select Scan barcodes.
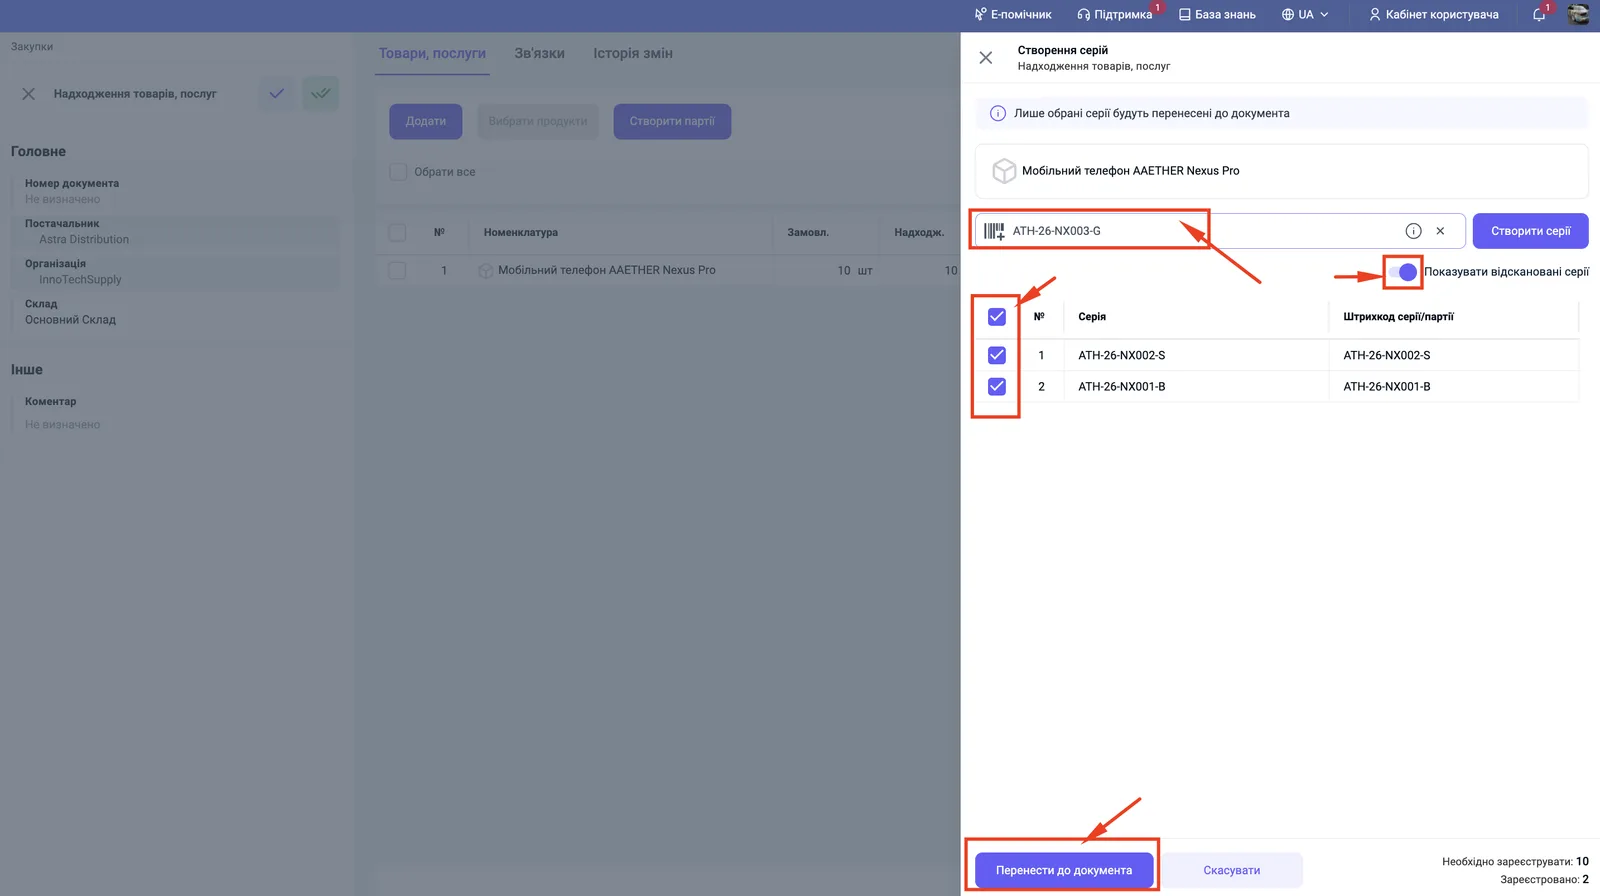
- In the “Series creation” panel, scan the barcodes on the product or enter a number in the “Series barcode” field and press Enter. Each scan adds a row, and the series name equals the barcode.
- If you want Bimp to create the series itself, click Create series.
- Turn on the “Show scanned series” switch and check the list: the series you need must be ticked. At the bottom of the panel you can see how many series must be registered and how many are already registered.
- Click Transfer to document.
After the document is posted, a separate card is created for each series.
How to record series in informational mode
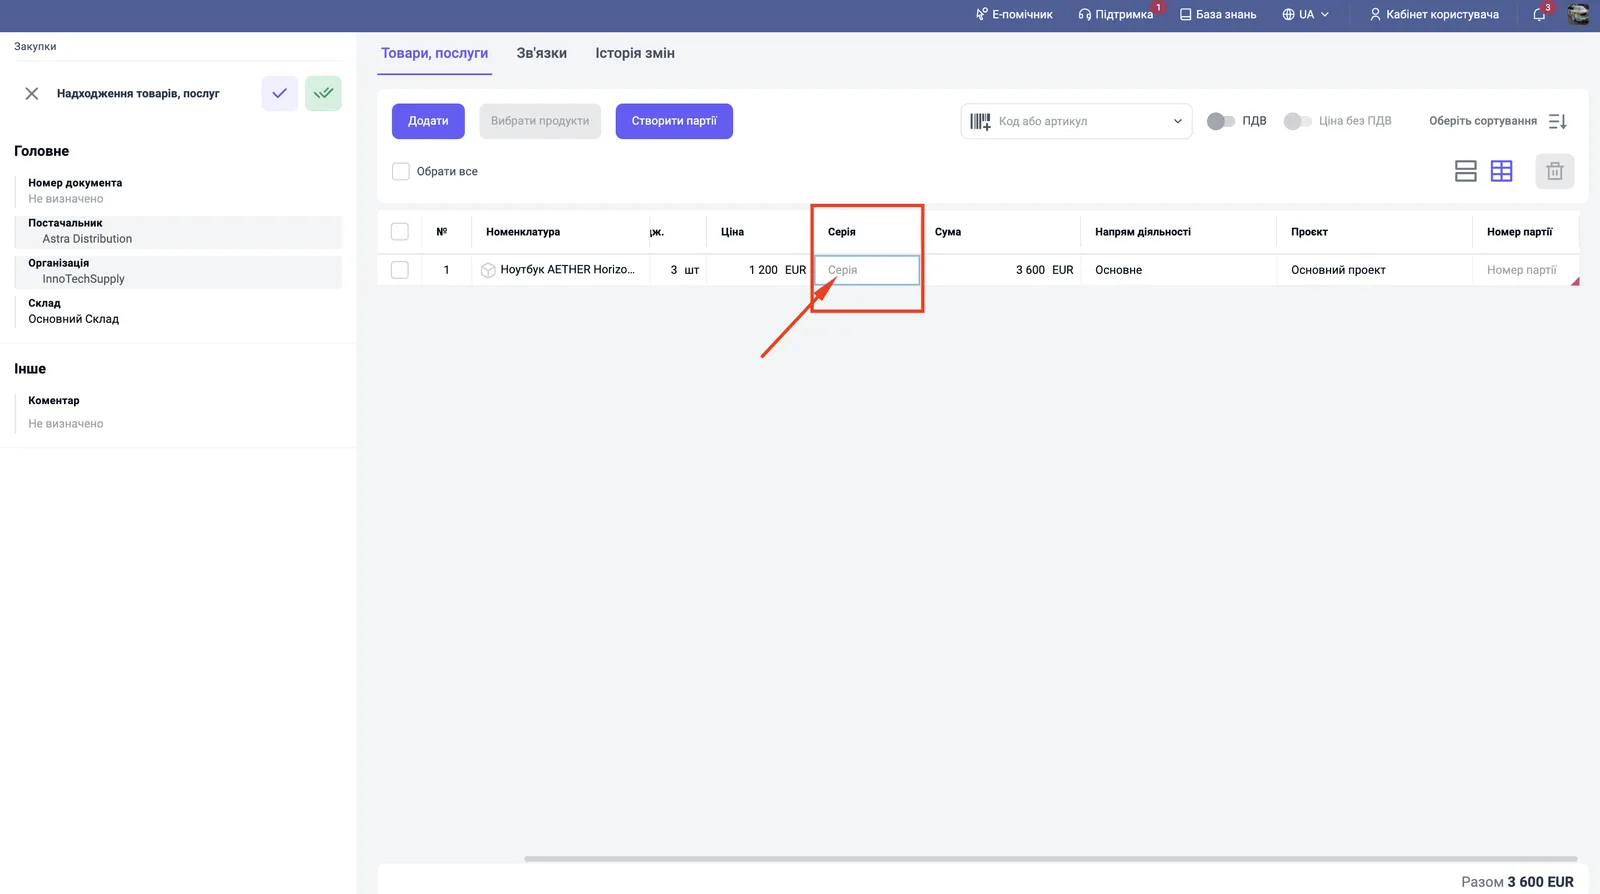
In informational mode, series are added directly from the “Series” column and linked to the delivery batch.
- Create a supplier order, and based on it, a “Goods receipt”.
- In the product row, click the cell of the “Series” column. The “Series creation” panel opens on the right.
- Place the cursor in the “Series barcode” field and scan the numbers, or click Create series to generate them or enter them manually. The series value automatically equals the barcode; the field reacts to Enter or a scanner.
- Turn on “Show scanned series”, check the list and click Transfer to document.
Where to view and how to delete series
Series are stored in the product card.
- Open the product card.
- Go to the “Batches” tab.
- Open the batch you need and the “Series” subtab, where you will find the list of series with barcodes.
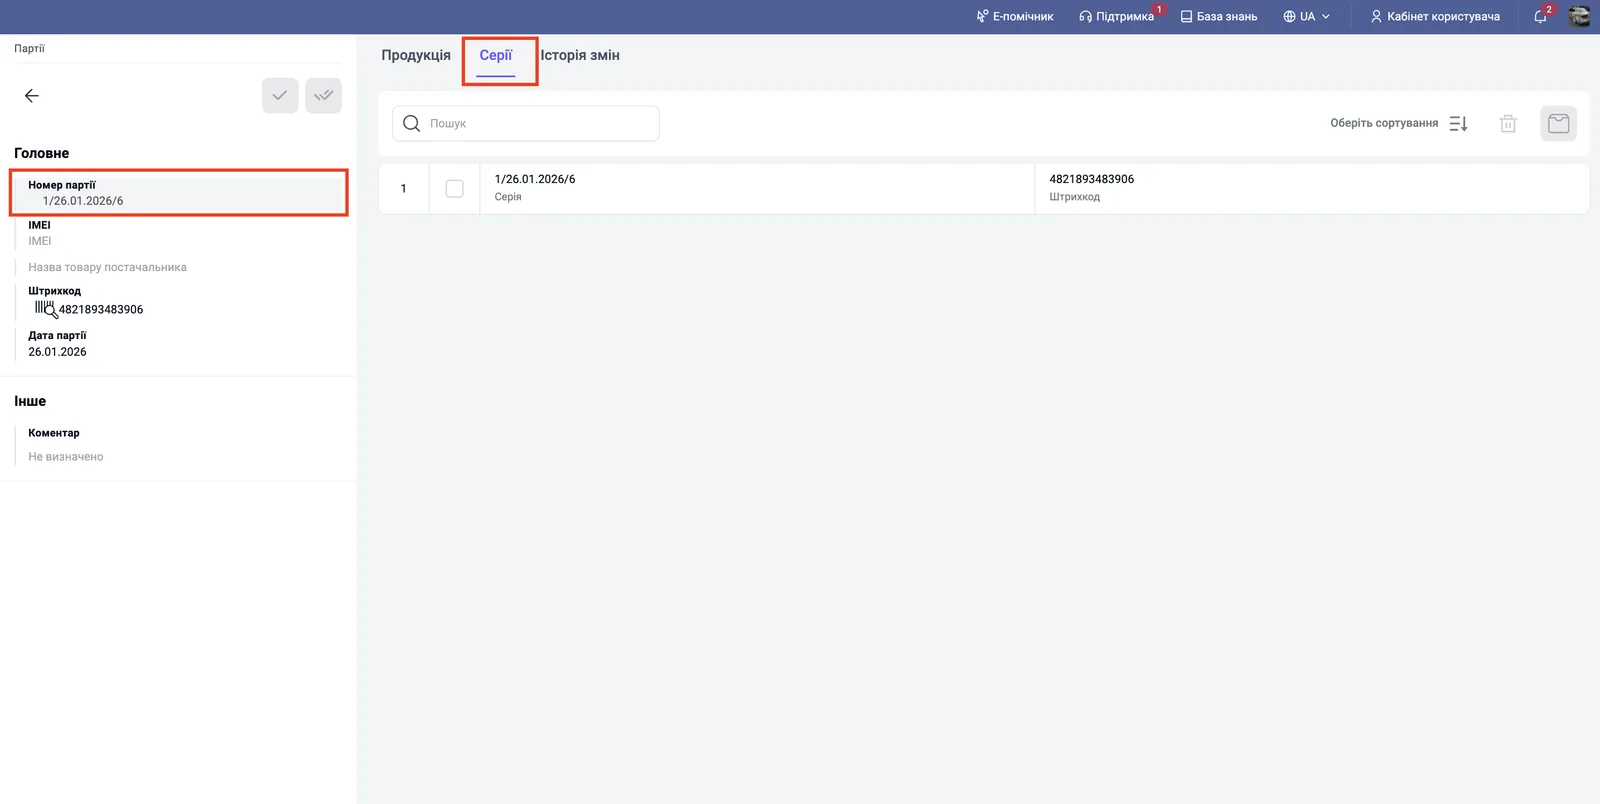
You can delete a series created by mistake only in the card of that series in the directory. If search or the scanner does not find a series, see Searching and scanning serial numbers.
FAQ
What happens if I scan fewer series than the quantity in the goods receipt?
Bimp splits the product in the document: each scanned unit becomes a separate row with a series, and the remainder stays as one row without a series.
How do I delete a series created by mistake?
Only through the card of that series in the directory: open the product card, the "Batches" tab, the batch you need and the "Series" subtab.
How does strict series tracking differ from informational tracking?
In strict mode, Bimp controls the balance of each series, and you must specify it on write-off and sale. In informational mode, series are only stored as data in the batch, and the warehouse is not blocked by discrepancies.
More about this in Bimp: Procurement in Bimp