
Printing a goods and transport waybill (form 1-TN)
On this page
A 1-TN waybill is a paper waybill for transporting cargo by road; it is not a Nova Poshta waybill. In Bimp it is printed from a Sales of goods and services document: first add the vehicle to the "Vehicles" reference book, fill in the "Print" block in the sale, click the printer icon, and choose "Waybill".
1-TN waybill and Nova Poshta waybill: what is the difference
A 1-TN waybill and a Nova Poshta waybill are different documents, and they are created differently in Bimp.
| 1-TN waybill (this article) | Nova Poshta waybill | |
|---|---|---|
| What it is | A standard goods and transport waybill for carrying cargo by car | An express waybill of a delivery service |
| What it is for | The cargo travels by car (your own or a hired carrier) and a paper accompanying document is needed | Sending a parcel through Nova Poshta |
| Where it is created | The “Waybill” print form of the Sales of goods and services document | In the customer order, through the Nova Poshta integration |
| Required setup | The “Vehicles” reference book, the “Print” block in the sale | Connecting Nova Poshta |
If you send a parcel with Nova Poshta, see Creating a Nova Poshta waybill from an order and Bulk printing of Nova Poshta waybills.
How to set up the “Vehicles” reference book
You enter the vehicle data in the reference book once, and after that it is filled into every waybill automatically.
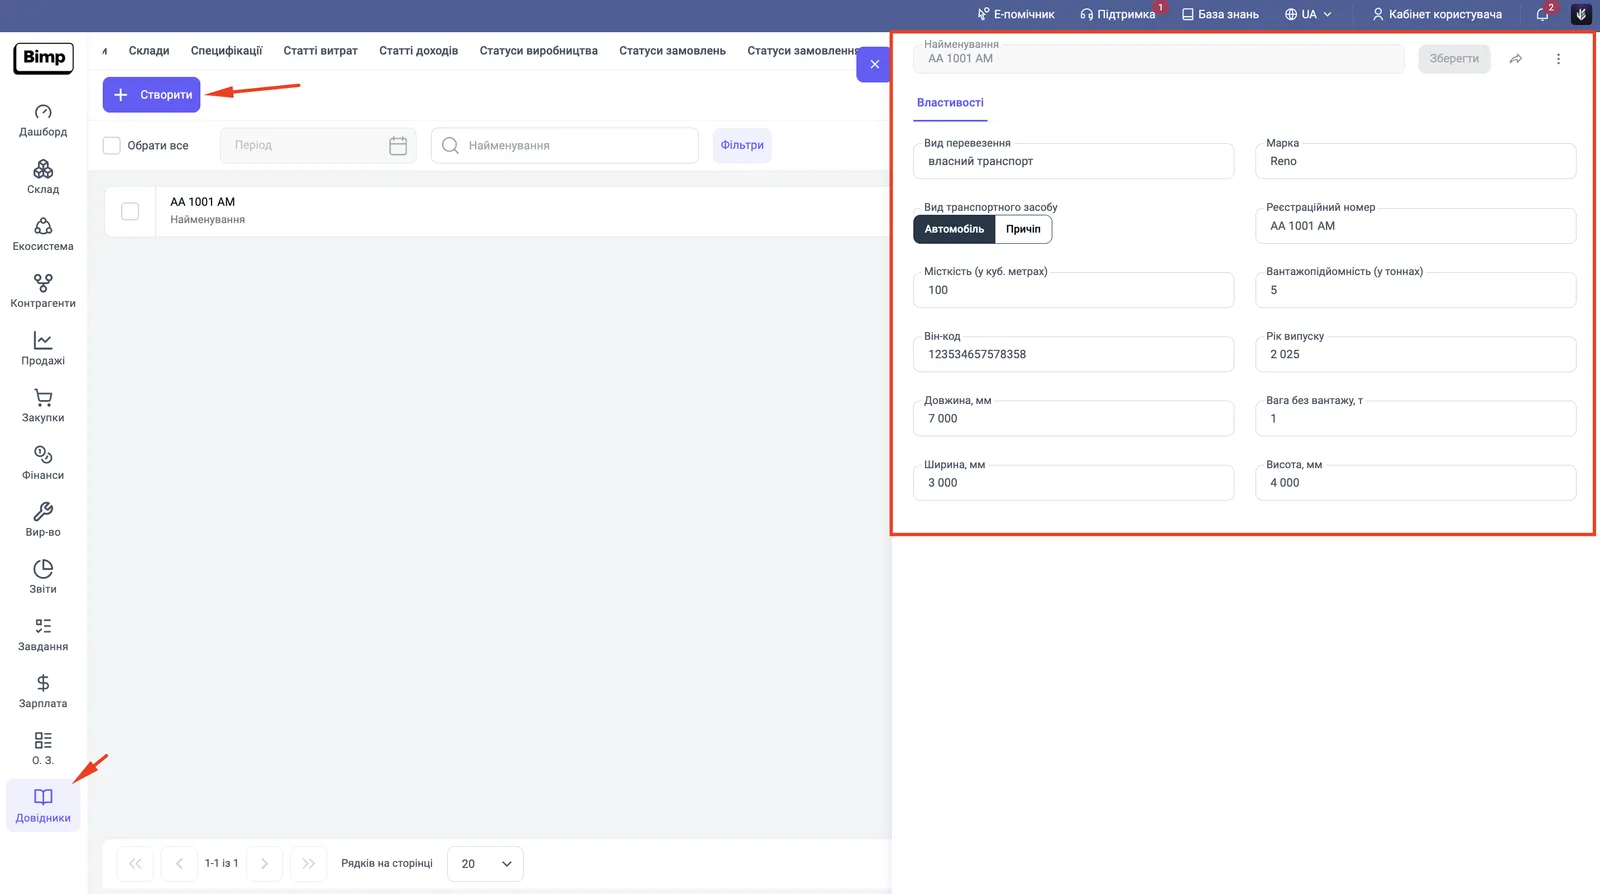
- Open Directories → Vehicles and click Create (or open an existing card).
- Fill in the vehicle details: “Transport type” (for example, own transport), “Make”, “Vehicle kind” (Car or Trailer), “Registration number”, “Capacity”, “Load capacity”, “VIN code”, “Year of manufacture”.
- Enter the dimensions in the fields “Length, mm”, “Width, mm”, “Height, mm” and “Unladen weight, t”.
- Save the card.
How to fill in the “Print” block in a sales document
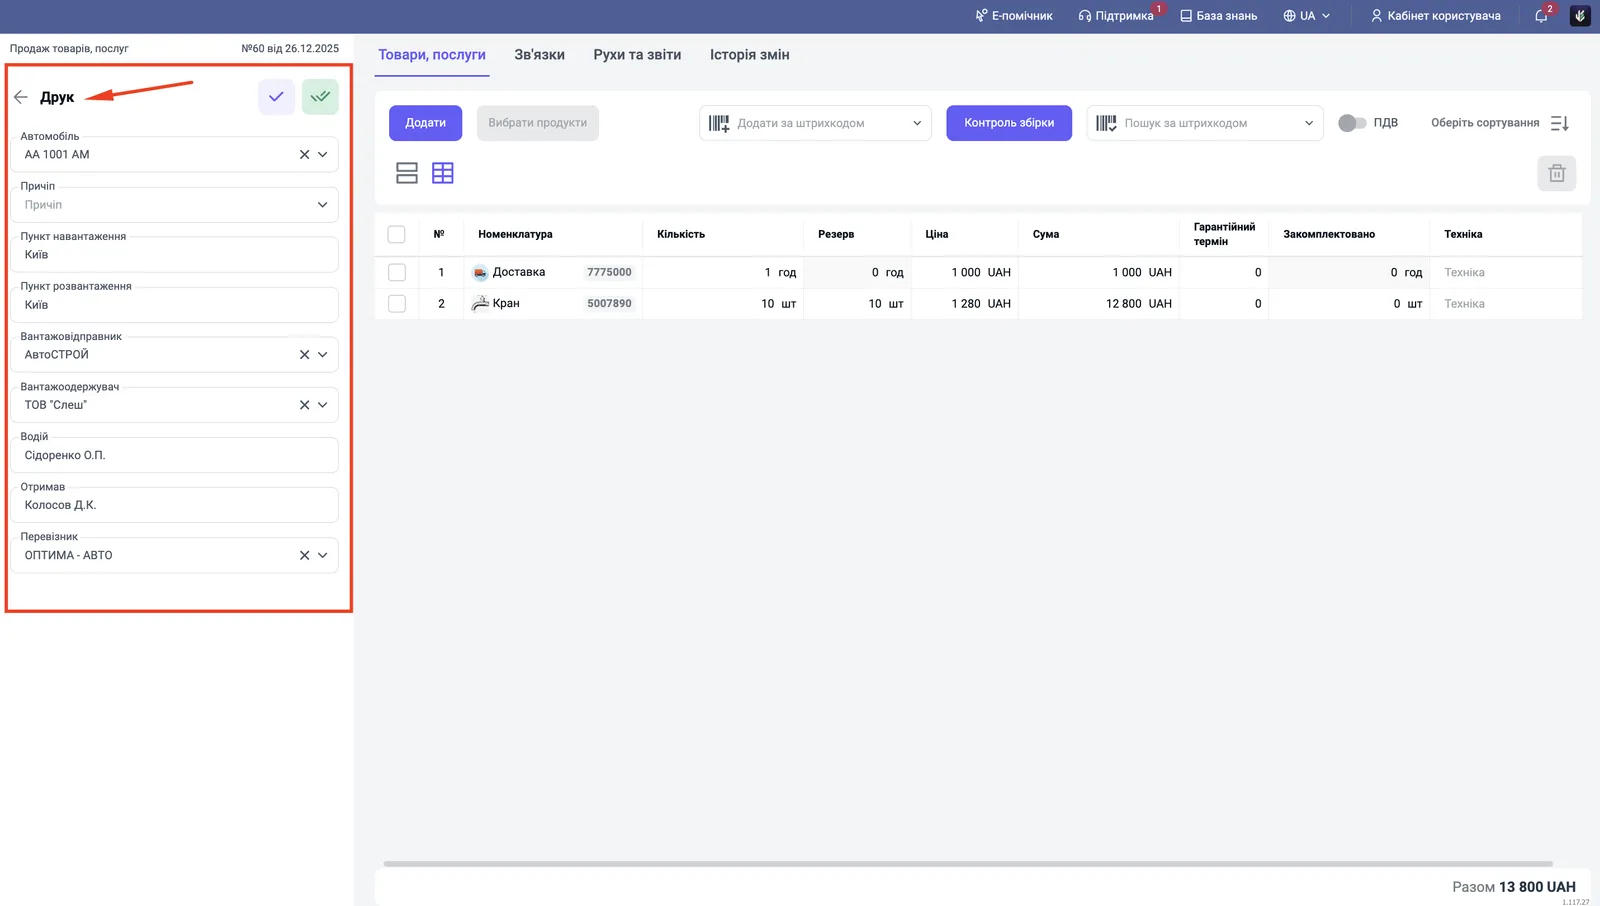
The waybill is built from the data you enter in the “Print” block of the left panel of the Sales of goods and services document.
- Open the Sales of goods and services document (Shipment) and go to the Print block.
- Fill in the fields:
- “Vehicle”: choose the vehicle from the reference book;
- “Trailer”: if there is one;
- “Loading point”: the city or address of departure;
- “Unloading point”: the delivery address;
- “Consignor” and “Consignee”: choose from the reference book;
- “Driver”: the driver’s full name;
- “Received by”: who received the cargo;
- “Carrier”: the carrier company.
- Save the changes with the check mark.
How to generate and print the waybill
The 1-TN form is generated with the print button in the sales document.
- In the same Sales of goods and services document, click the printer icon on the top bar.
- Choose Waybill.
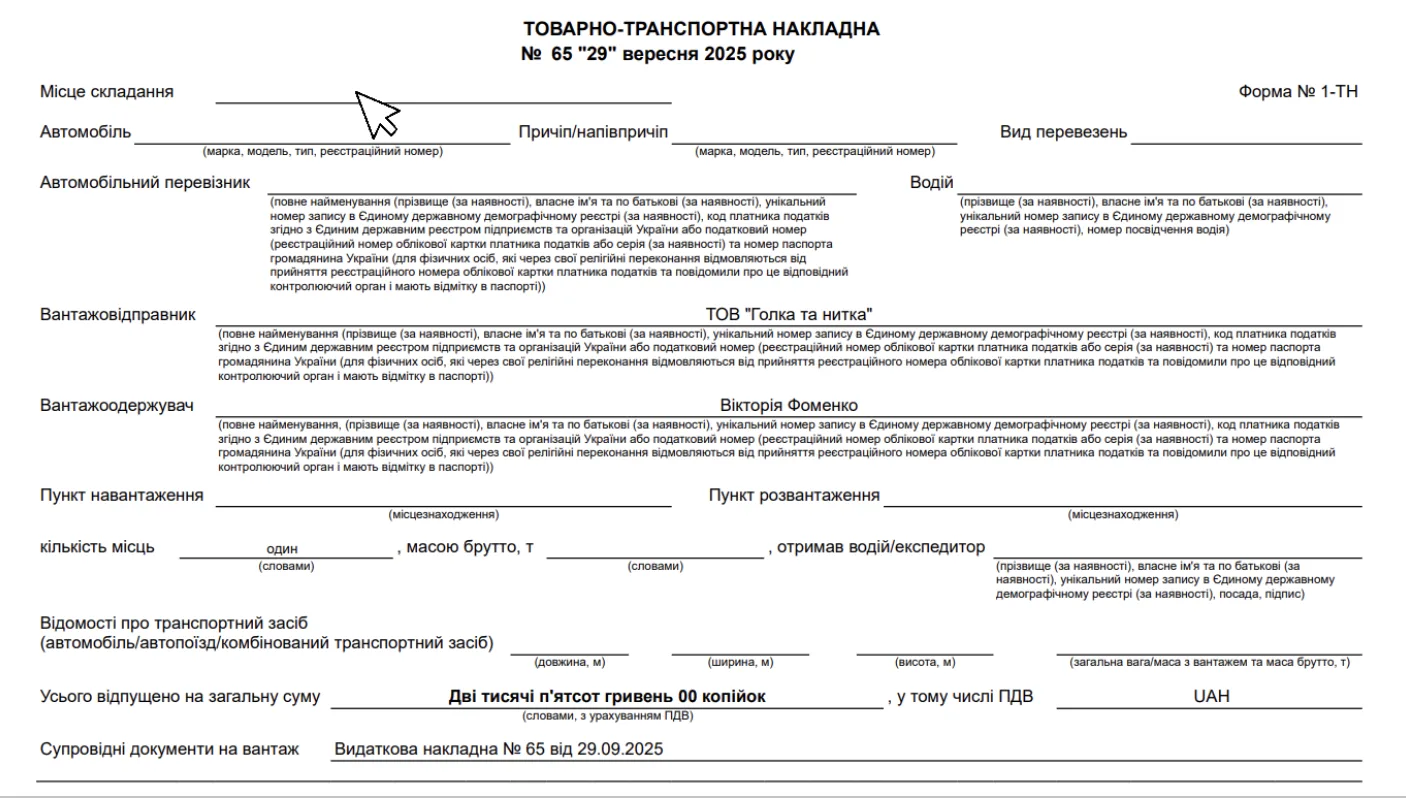
- Bimp opens form No. 1-TN as a PDF. Check it and print it.
After printing, add by hand:
- “Place of issue”, if needed;
- the gross weight.
For the other print forms of the document, see Printing an invoice and a delivery note, and exporting to Excel.
FAQ
How does a 1-TN waybill differ from a Nova Poshta waybill?
A 1-TN waybill is a goods and transport waybill for carrying cargo by car (your own or hired). A Nova Poshta waybill is the carrier's express waybill, created through the integration. These are different documents with different processes in Bimp.
In what units should I enter the vehicle dimensions?
In millimeters. In the printed waybill they appear already in meters: 7000 mm in the card gives 7 m in the waybill.
Which waybill fields do I need to fill in manually after printing?
Usually "Place of issue" and the gross weight: Bimp does not fill them in. Add them by hand on the printed form.
More about this in Bimp: Sales in Bimp