
Packing an order with a scanner: packing control and waybill scanning
On this page
Bimp lets you pack and check an order with a barcode scanner in two ways: with the "Packing control" button in a Sales of goods and services document, or by scanning the waybill in the order list, which opens the packing mode by itself. The system compares what was scanned with the plan, does not let you pack extra items, and leaves only the actual quantity in the sale.
What packing control is for
Packing control checks the actual contents of a parcel by barcode before you post the shipment, and corrects the Sales of goods and services document to match the real quantity. This way exactly as much is written off the warehouse as went to the customer.
Example. A manager created an order for 5 smartphones and 5 cases. The warehouse worker scans the goods and sees that one case is defective, so he puts 4 in the box. He clicks “Transfer to document”, and the quantity of cases in the sale changes from 5 to 4. The customer does not pay for goods they did not receive.
There are two ways: checking with a button in the document, and automatic packing by scanning the waybill.
How to check goods with the “Packing control” button
The “Packing control” button opens a side scanning panel in the Sales of goods and services document. The document is usually created based on an order; see Shipment.
- Open the Sales of goods and services document and the “Products, services” tab.
- Click Packing control. A panel with the list of planned items opens on the right.
- Scan the product barcodes into the “Barcode” field (it is always active). Each scan adds one unit to the “Scanned qty” column.
- When everything is packed, click Transfer to document. The quantities in the document are overwritten with the scanned ones, and the panel closes.
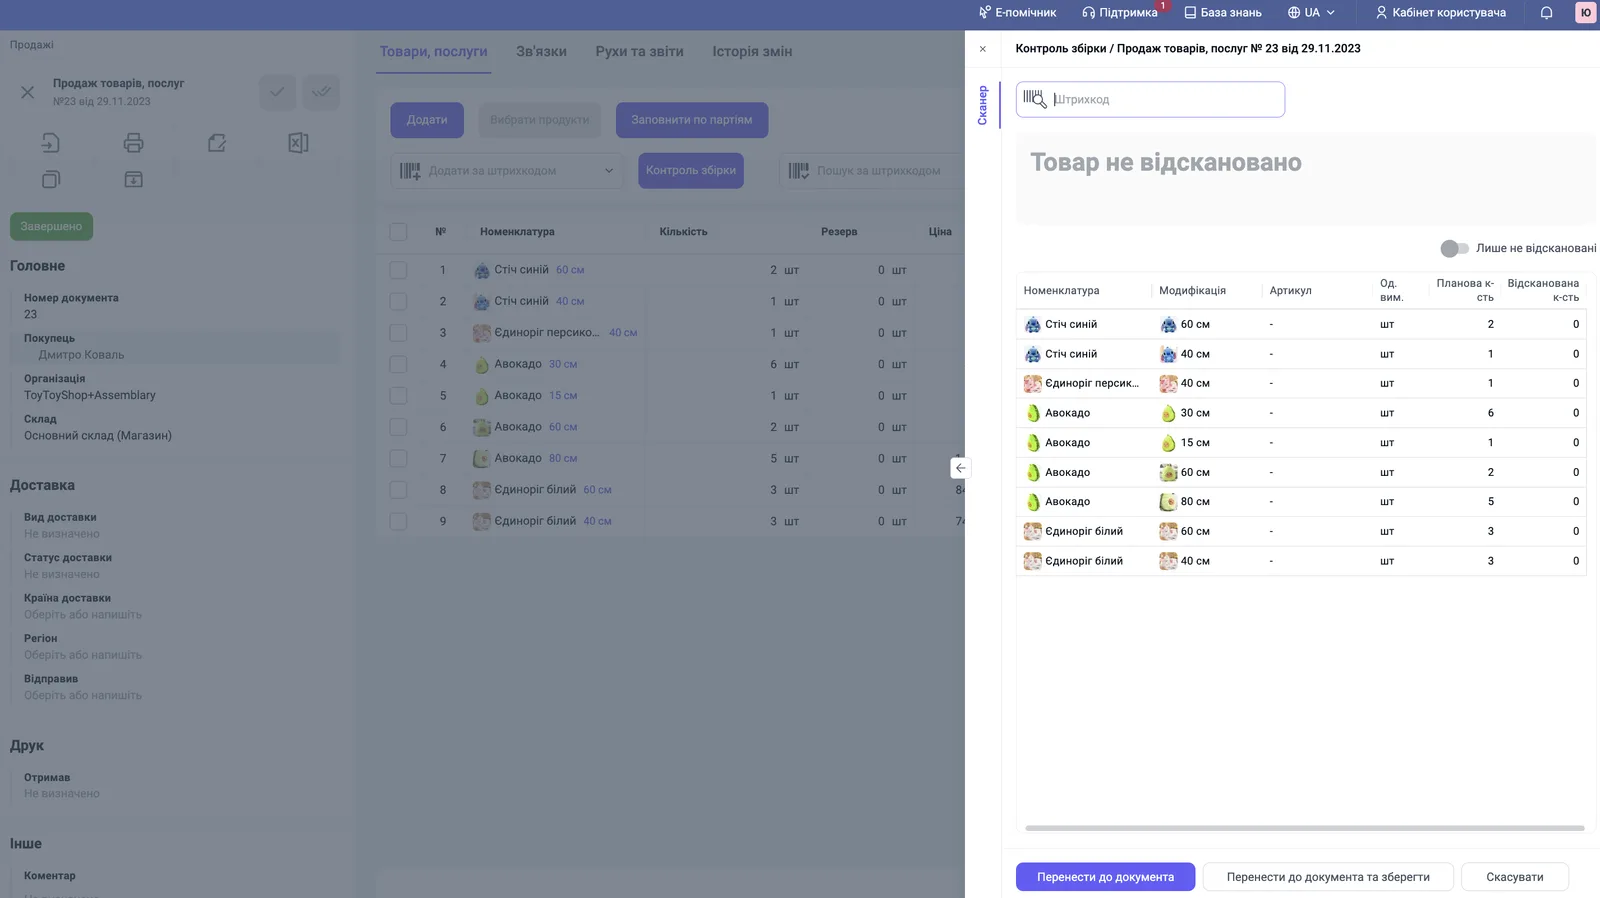
The “Only not scanned” switch leaves in the table only the items that still need to be packed. The “Transfer to document and save” button also saves the document.
How the system reacts to scanning
| Situation | Reaction |
|---|---|
| The product is in the document | 1 is added to “Scanned qty” |
| Scanned more than planned | Message “Planned quantity exceeded for the product…” |
| The product is not in the document | Message “The product with barcode… is not in the document” |
| The full quantity is scanned | The row is highlighted in green |
How to pack an order by scanning the waybill
Scanning a waybill in the order list finds the order by the barcode of the waybill, creates or opens a Sales of goods and services document, and switches it to the “Packing” mode. You do not need to search for the order in the list manually.
-
Open Sales → Orders. You do not need to open the order card.
-
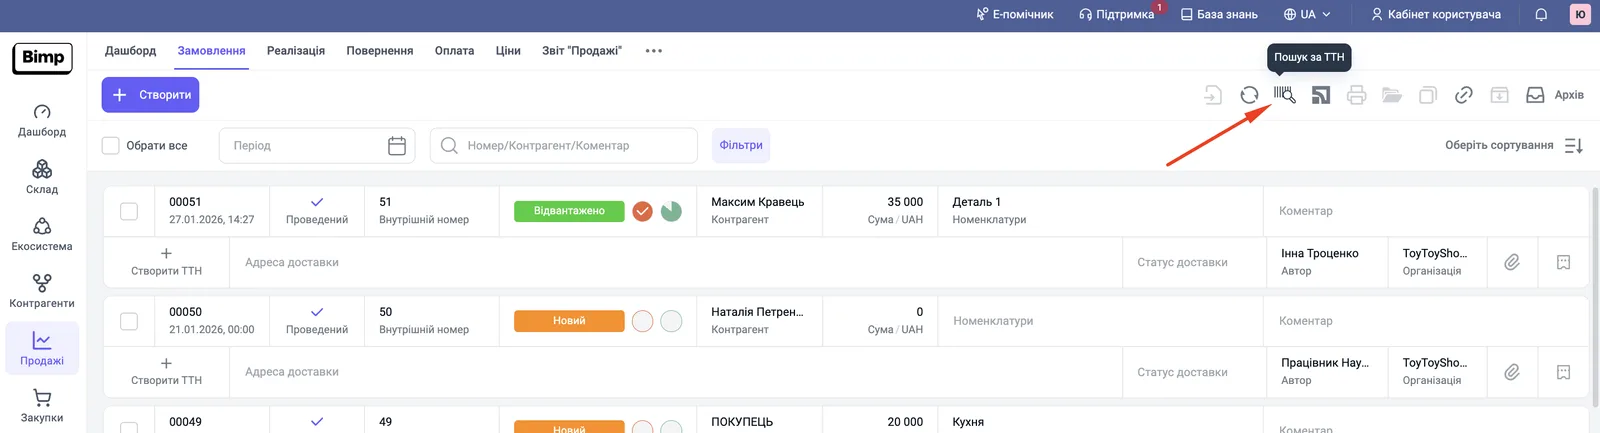
Scan the waybill barcode (for example, a Nova Poshta waybill). The search field is opened with the barcode icon, which has the hint “Search by waybill”.
-
Then, depending on the situation:
- if there is no sale yet, Bimp creates the document in the “New” status and opens it in the “Packing” mode;
- if the sale already exists, Bimp opens it without creating a duplicate.
-
Scan the goods. The system compares the actual quantity with the ordered one. When the last unit is scanned, a signal sounds and the message “Goods per document are fully packed” appears.
-
To finish, scan the technical barcode “Finish and post”. The document is posted, and Bimp returns to the order list for the next waybill.
Where to get the employee technical barcode
The technical code for finishing packing is the employee barcode. It is generated once in the employee card: in the Payroll → Employees section, open the card, click the refresh icon in the “Barcode” field, save the card, and print the code.
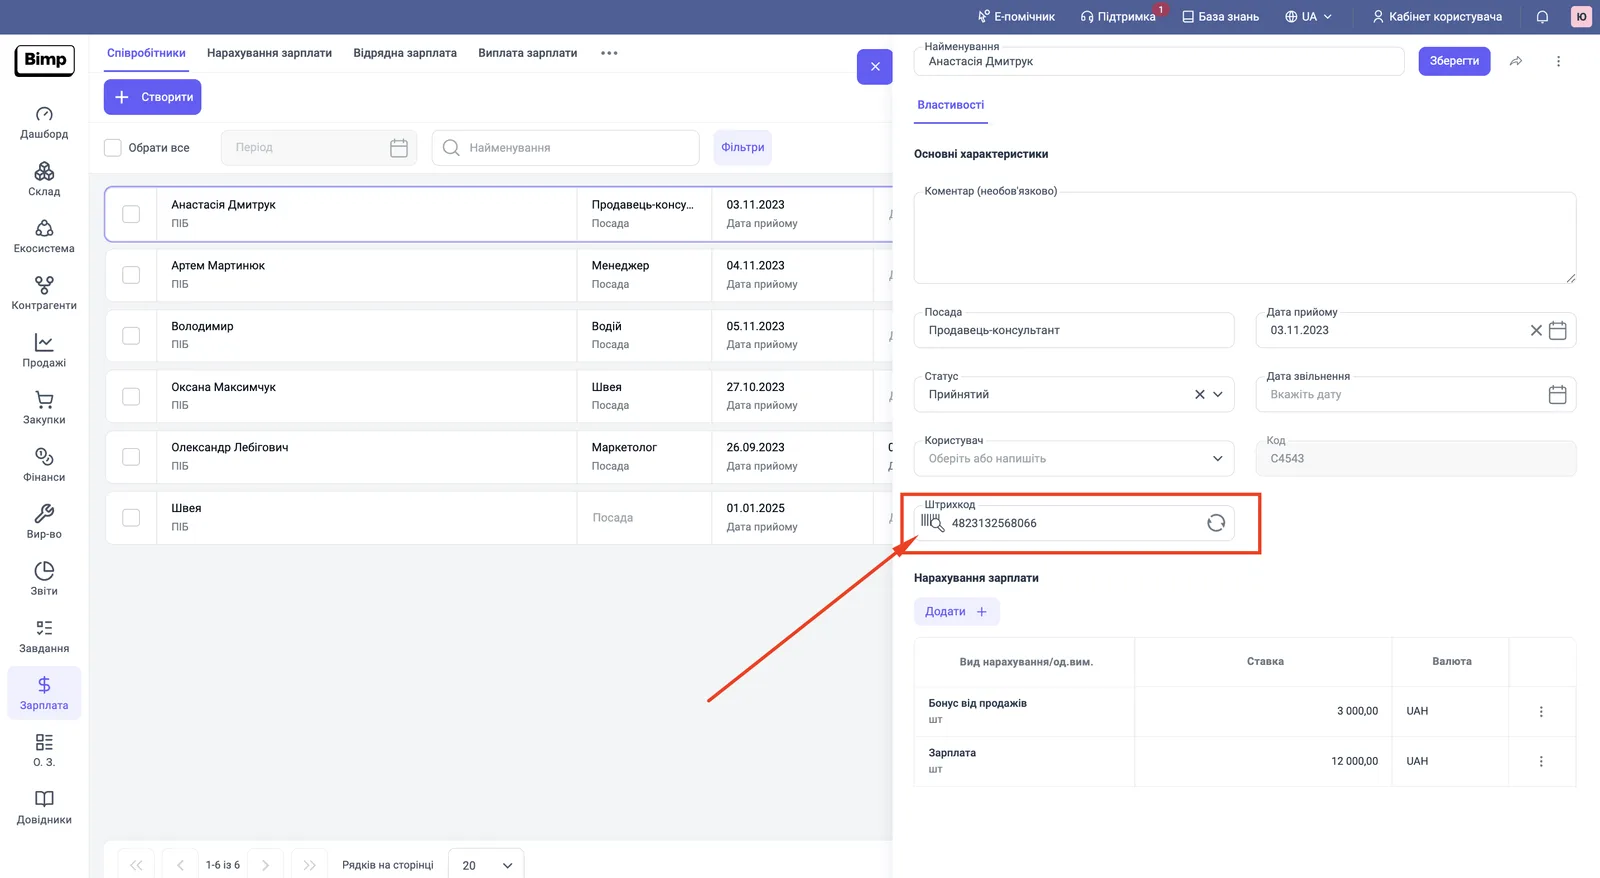
For more about the card, see Employee card.
FAQ
Does scanning add new lines to the document?
No. Packing control works only with the items already in the Sales of goods and services document. For an unknown product the system shows a message that the barcode is not in the document.
What happens if I close the packing control panel with the cross?
All scan results are ignored, and the quantity in the document stays as planned. To keep the result, click "Transfer to document".
Where do I get the employee barcode to finish packing?
The employee card (section "Payroll → Employees") has a "Barcode" field; the refresh icon next to it generates the code. Print it and scan it to finish and post the document.
More about this in Bimp: Sales in Bimp