
Ecosystem setup: connecting the supplier and the seller
On this page
Connecting a supplier (principal) and a seller (commission agent) in the Ecosystem takes five steps: the seller turns on batch accounting and "Receiving goods for sale", the supplier turns on "Transferring goods for sale", the parties exchange company IDs and create counterparties, and the seller creates a shared warehouse with access for the supplier.
What you need to connect two accounts
To connect, you need two Bimp accounts: the supplier’s (principal) and the seller’s (commission agent). The seller sets up their database first, then the supplier sets up theirs, then the parties exchange company IDs and create each other as counterparties. For the roles of the parties and the purpose of the Ecosystem, see the Bimp Ecosystem.
Example. A manufacturer (company A) wants to transfer a batch of goods to a showroom (company B) and see its sales. For this, the companies exchange IDs and set up a shared warehouse.
Step 1. Set up the seller (commission agent)
The seller turns on batch accounting of goods and receiving goods for sale.
-
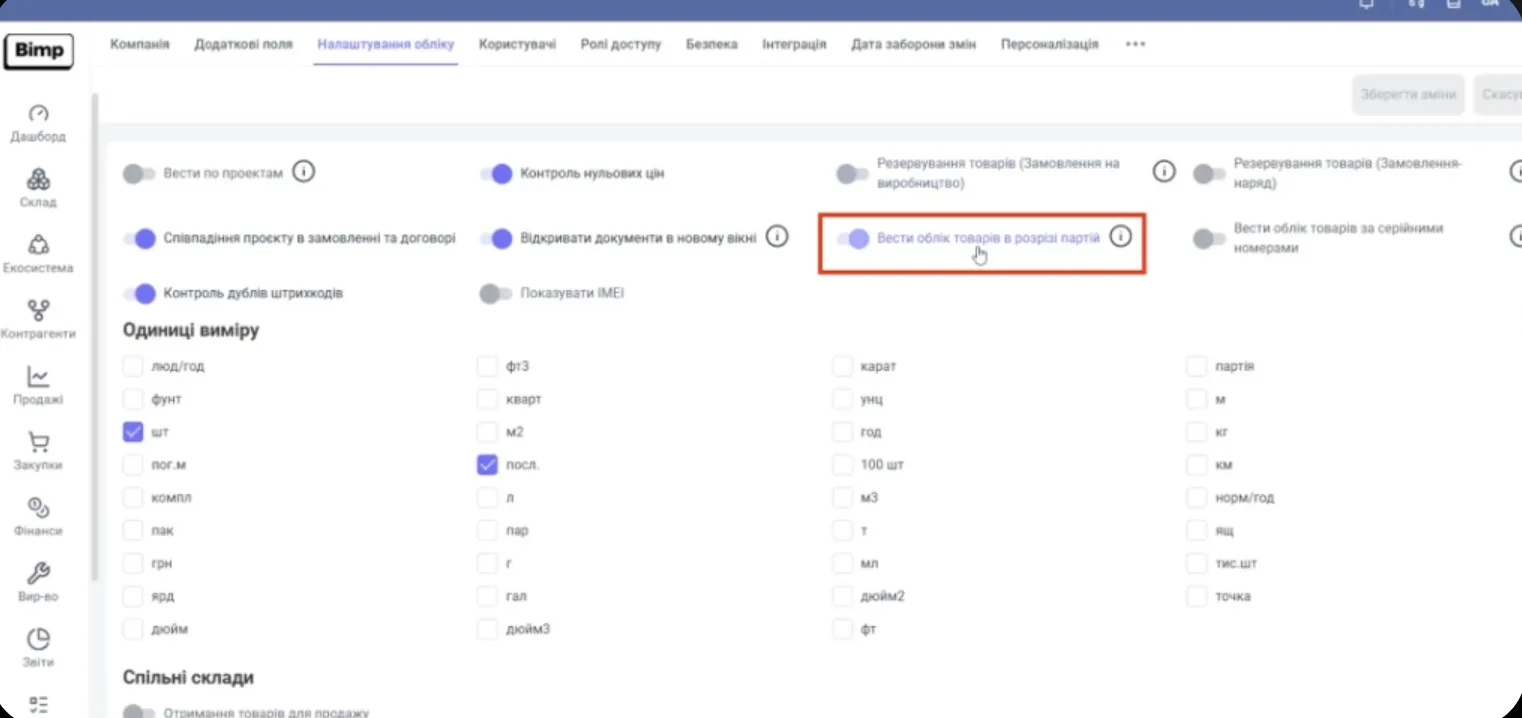
Open Company settings → Accounting settings.
-
Turn on the switch “Keep goods records by batches”.
-
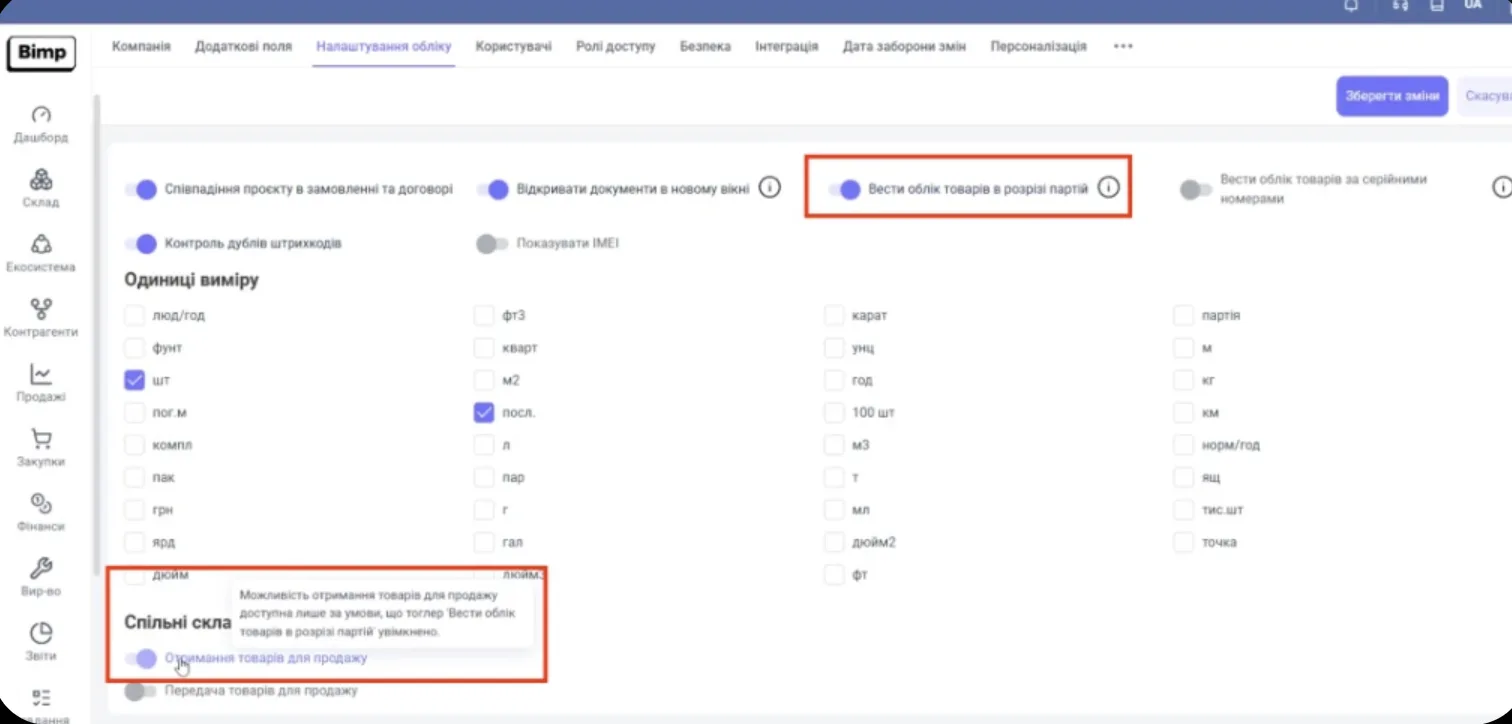
At the bottom of the page, in the “Shared warehouses” block, turn on “Receiving goods for sale”.
-
Click Save changes.
Step 2. Set up the supplier (principal)
The supplier turns on transferring goods for sale.
-
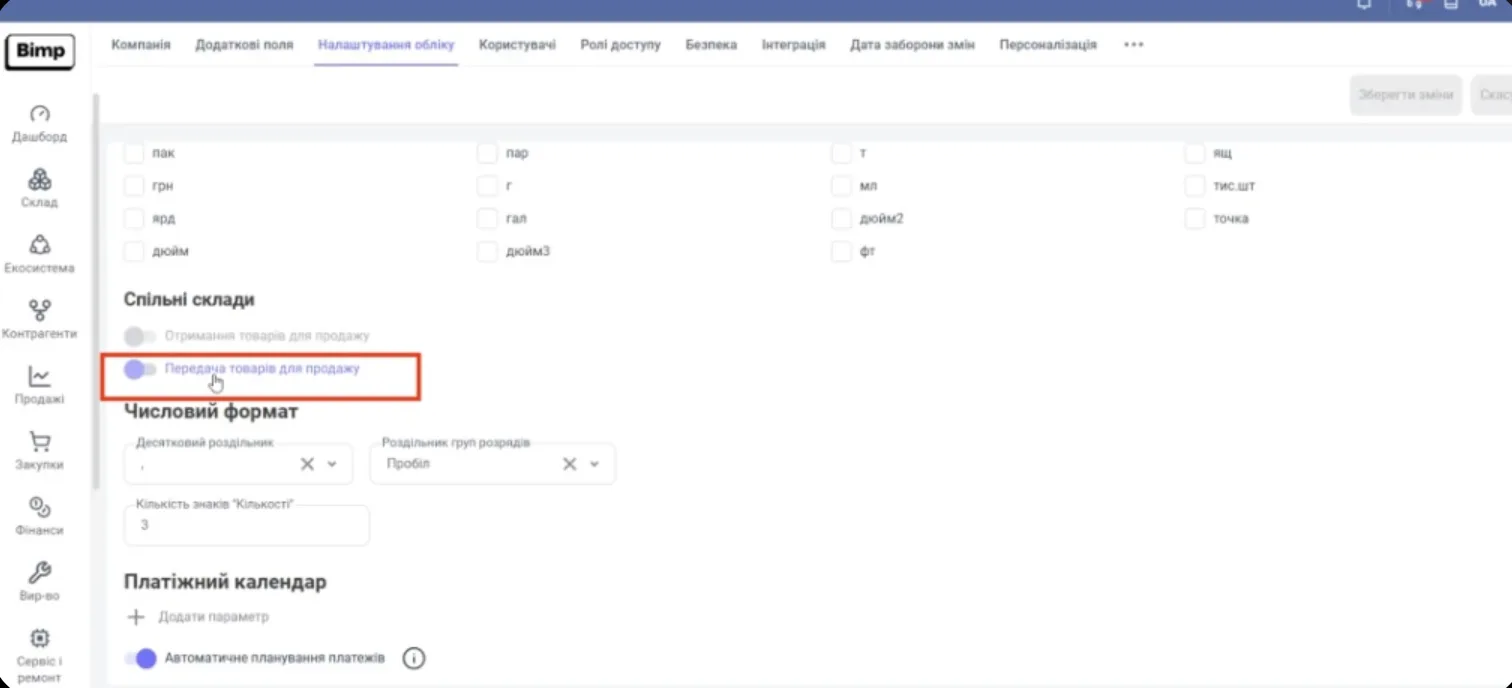
Open Company settings → Accounting settings.
-
In the “Shared warehouses” block, turn on “Transferring goods for sale”.
-
Click Save changes.
The supplier does not have to turn on batch accounting. For a general description of the accounting parameters, see Accounting settings.
Step 3. Exchange company IDs and create counterparties
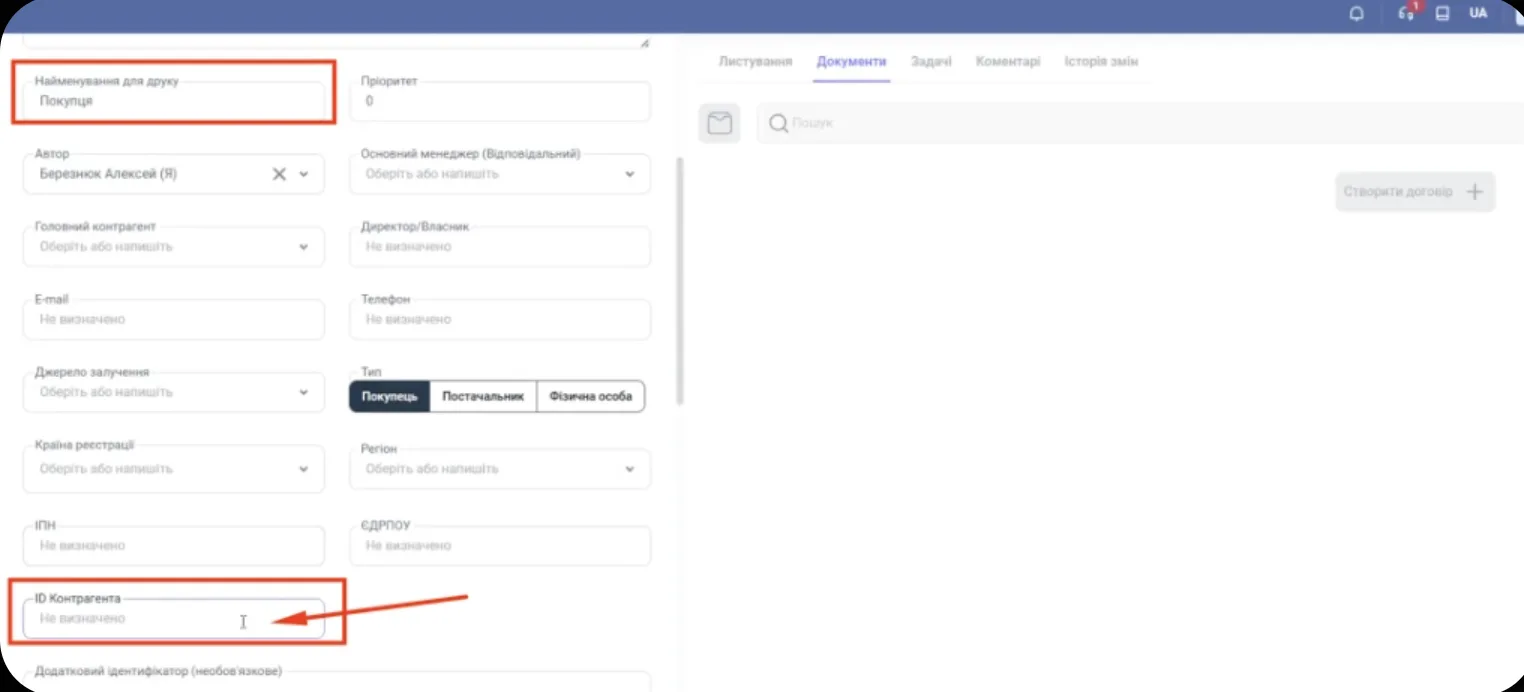
For the accounts to “see” each other, each party creates the partner as a counterparty and enters the partner’s company ID in it.
-
Each party opens Company settings → Company and copies the code from the “Company ID” field. Send it to your partner through a messenger.
-
In the supplier’s account, create a counterparty: the name of the partner’s store, type “Customer”, and in the “Counterparty ID” field the seller’s company ID.
-
In the seller’s account, create a counterparty: the name of the manufacturer, type “Supplier”, and in the “Counterparty ID” field the supplier’s company ID.
-
Save both cards.
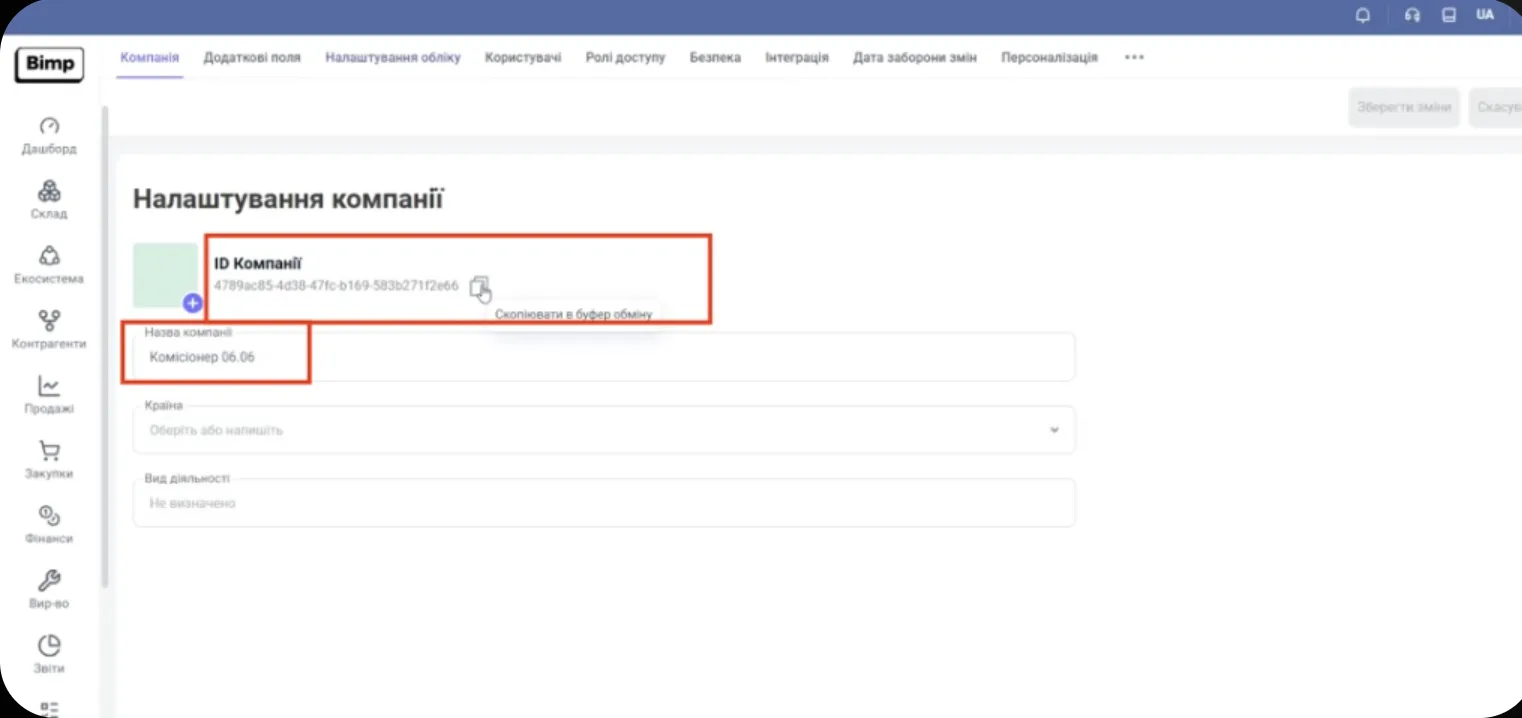
For details on the counterparty card, see Counterparty card and addresses. For settlements you will also need a contract: it determines the debt currency, see Prices and cost price in the Ecosystem.
Step 4. Create a shared warehouse (seller)
The seller creates the shared warehouse so that the supplier can see the stock.
-
Open the warehouse reference list and click Create: see Warehouses and stores.
-
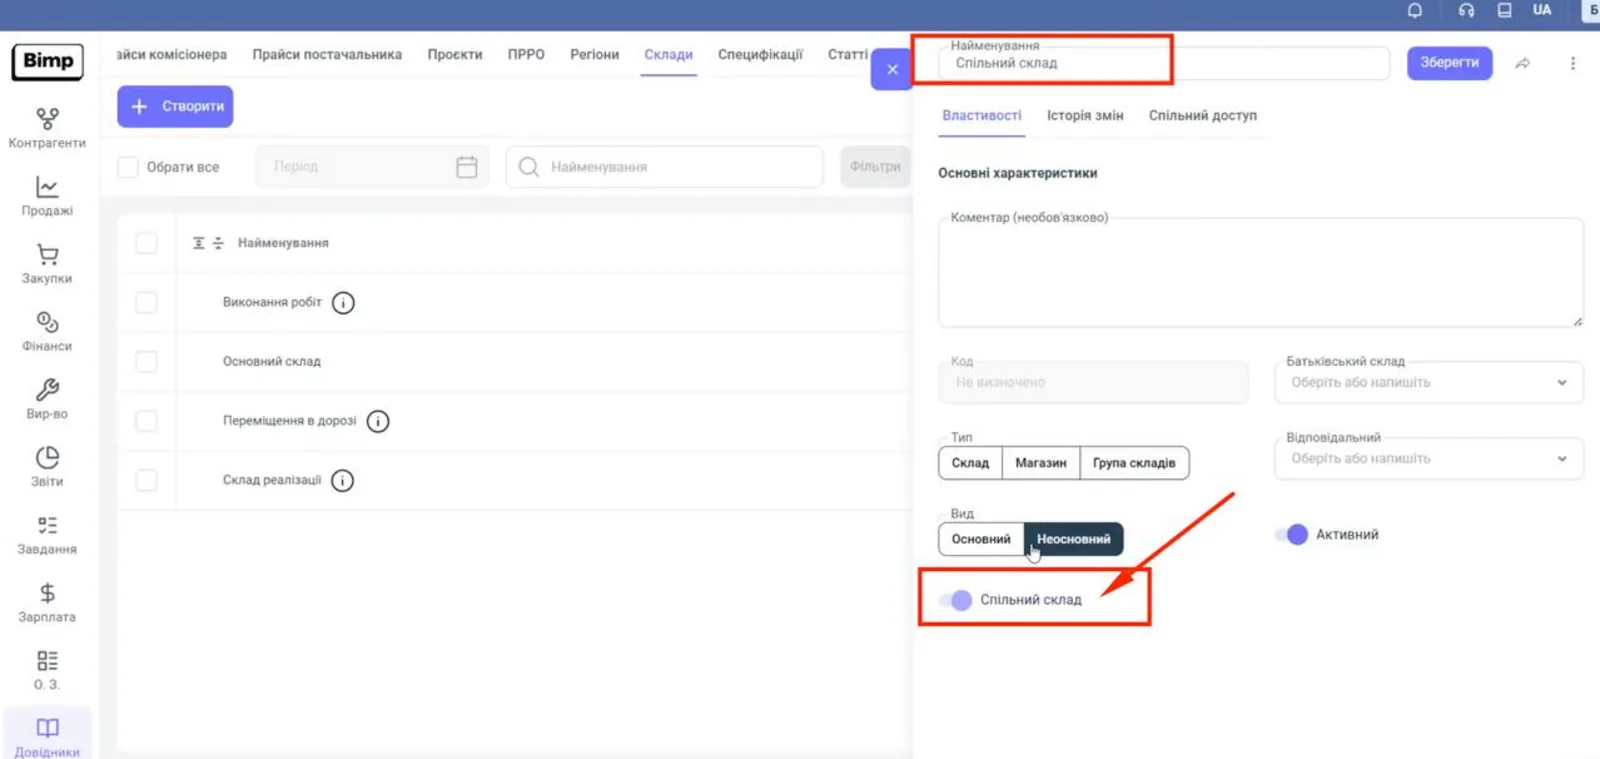
Enter a name, for example “Shared warehouse”.
-
Turn on the “Shared warehouse” switch.
-
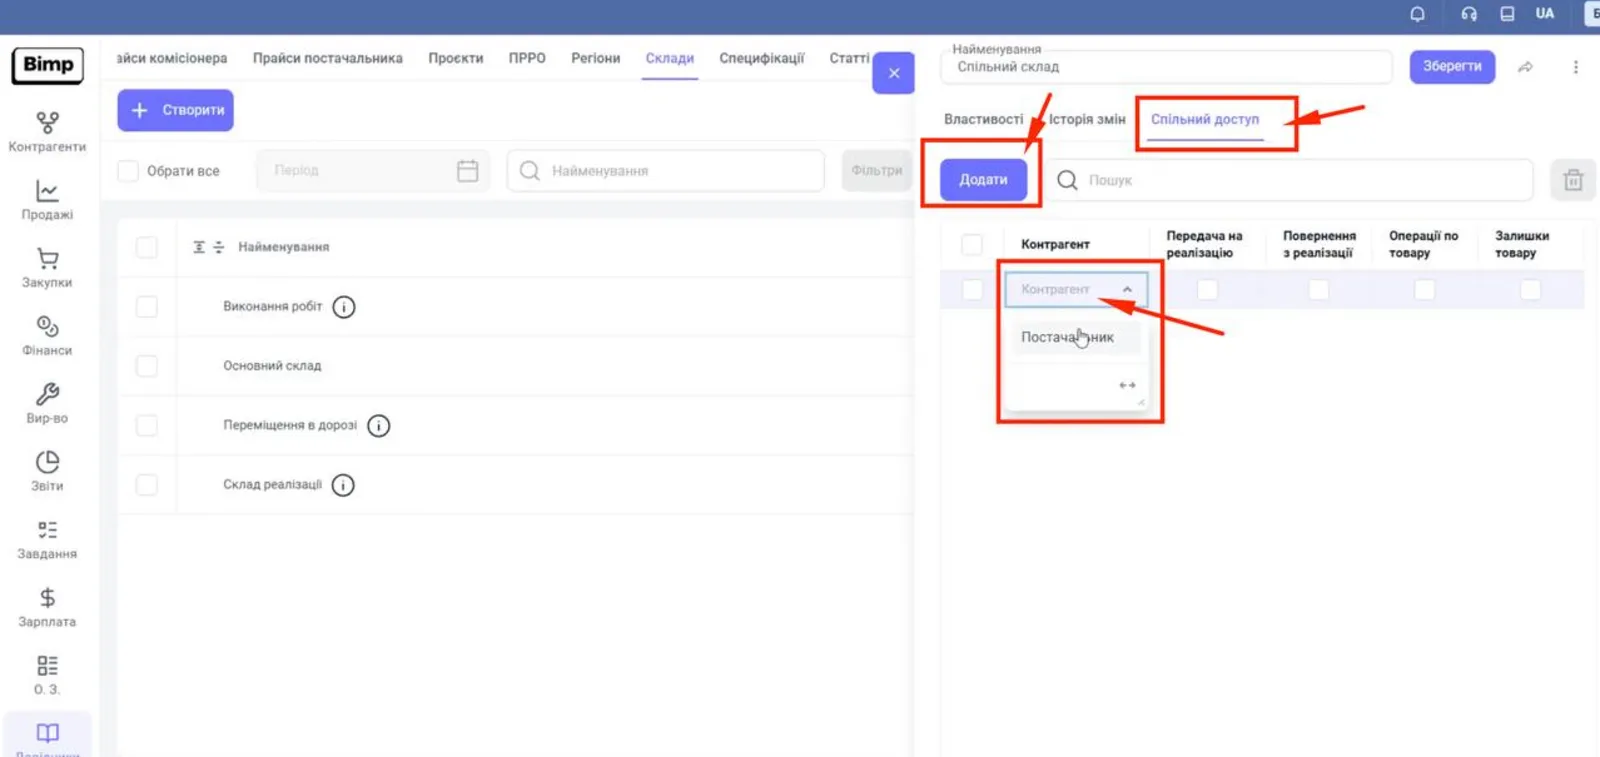
Go to the “Shared access” tab that appeared, click Add and choose in the “Counterparty” column the supplier from step 3.
-
Save the warehouse.
Step 5. Check the result
After saving, the seller’s shared warehouse automatically appears in the supplier’s list of warehouses. It can be chosen in goods transfer documents.
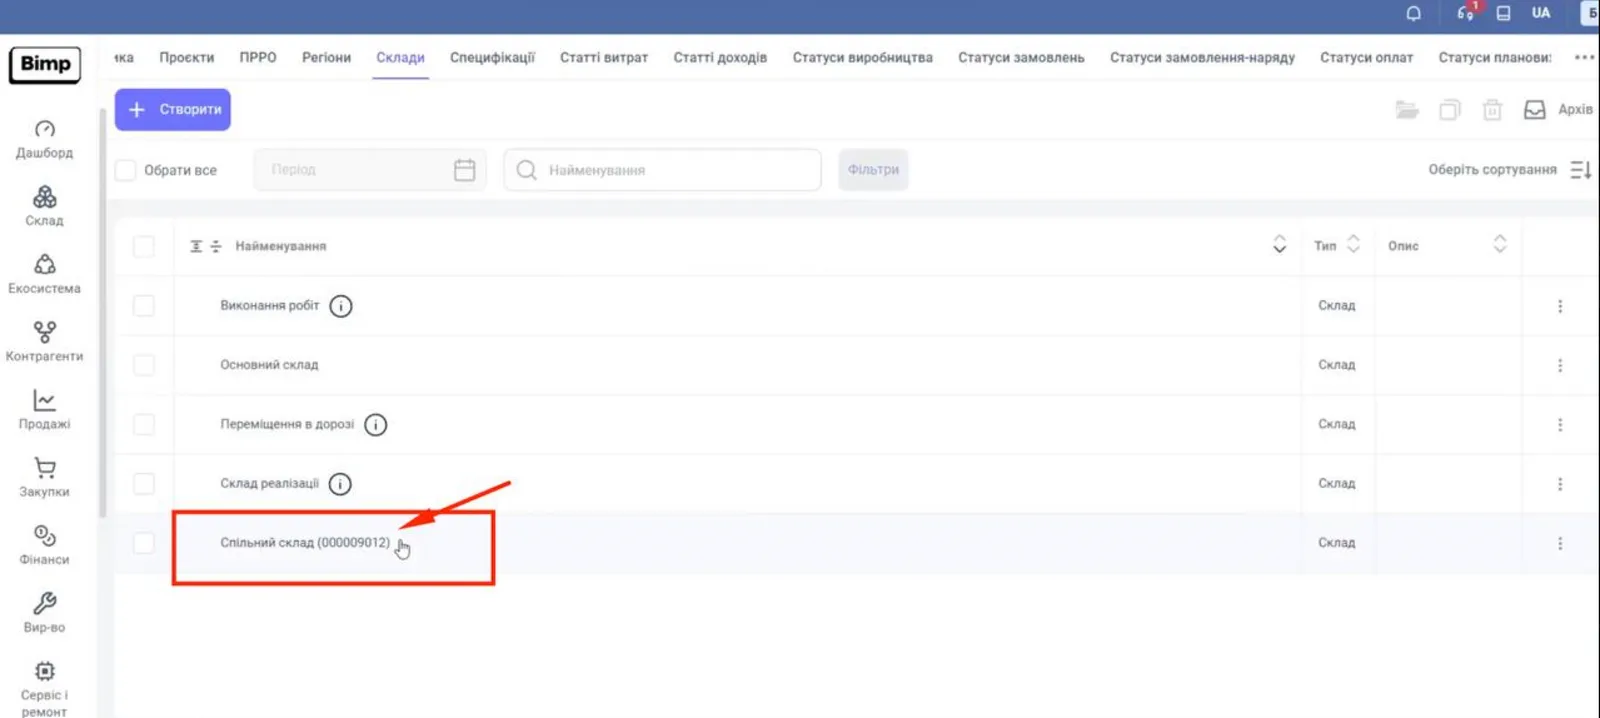
Next, the supplier transfers goods to this warehouse: see Transferring and receiving goods in the Ecosystem.
FAQ
Where do I get my partner's company ID?
The partner opens Company settings, the "Company" tab, and copies the code from the "Company ID" field. Send it through a messenger, because the code must match exactly, character for character.
Does the supplier need batch accounting?
No. Accounting of goods by batches is required only for the seller (commission agent).
Why is the "Receiving goods for sale" switch inactive?
It is available only when "Keep goods records by batches" is turned on. Turn on batch accounting first.
More about this in Bimp: Sales in Bimp